

Creating a virtual machine
This guide creates a virtual machine and starts it, ready for you to install an operating system inside it.
Before you begin
Section titled “Before you begin”- The installation image (
.iso) for the operating system you want to install must already be uploaded. If it is not, follow Uploading an ISO image first. - Decide how much processing power, memory and disk space the virtual machine needs.
1. Sign in and start the wizard
Section titled “1. Sign in and start the wizard”- Open a web browser and go to
https://<server IP address>:8006 - Sign in as
rootwith the administrator password. - Click Create VM at the top right.
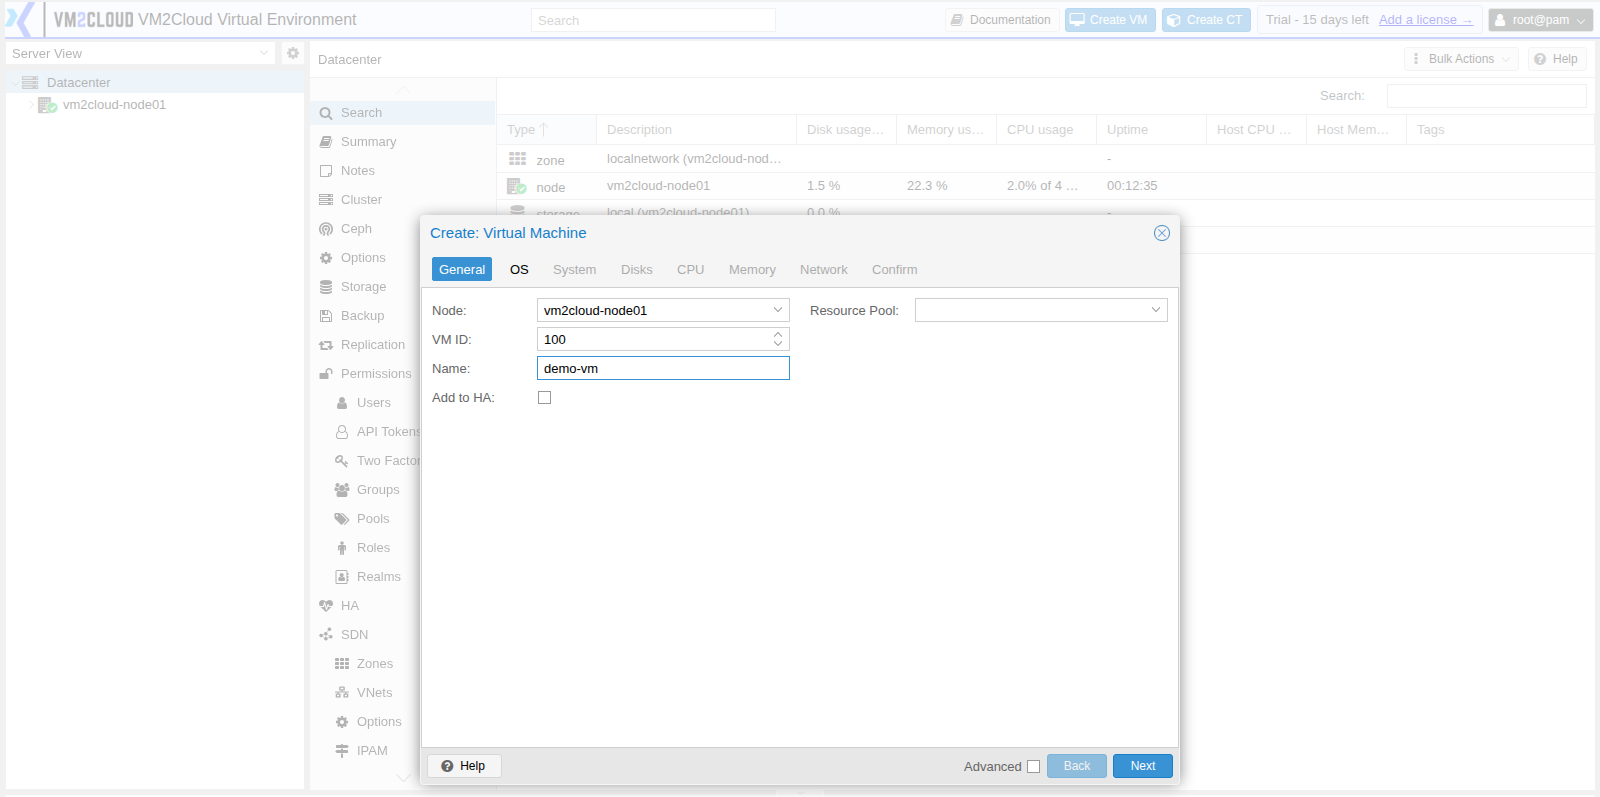
2. General — name the virtual machine
Section titled “2. General — name the virtual machine”- Check that Node shows your server.
- Leave VM ID as it is, unless you use your own numbering.
- In Name, type a name for the virtual machine, for example
demo-vm. - Click Next.
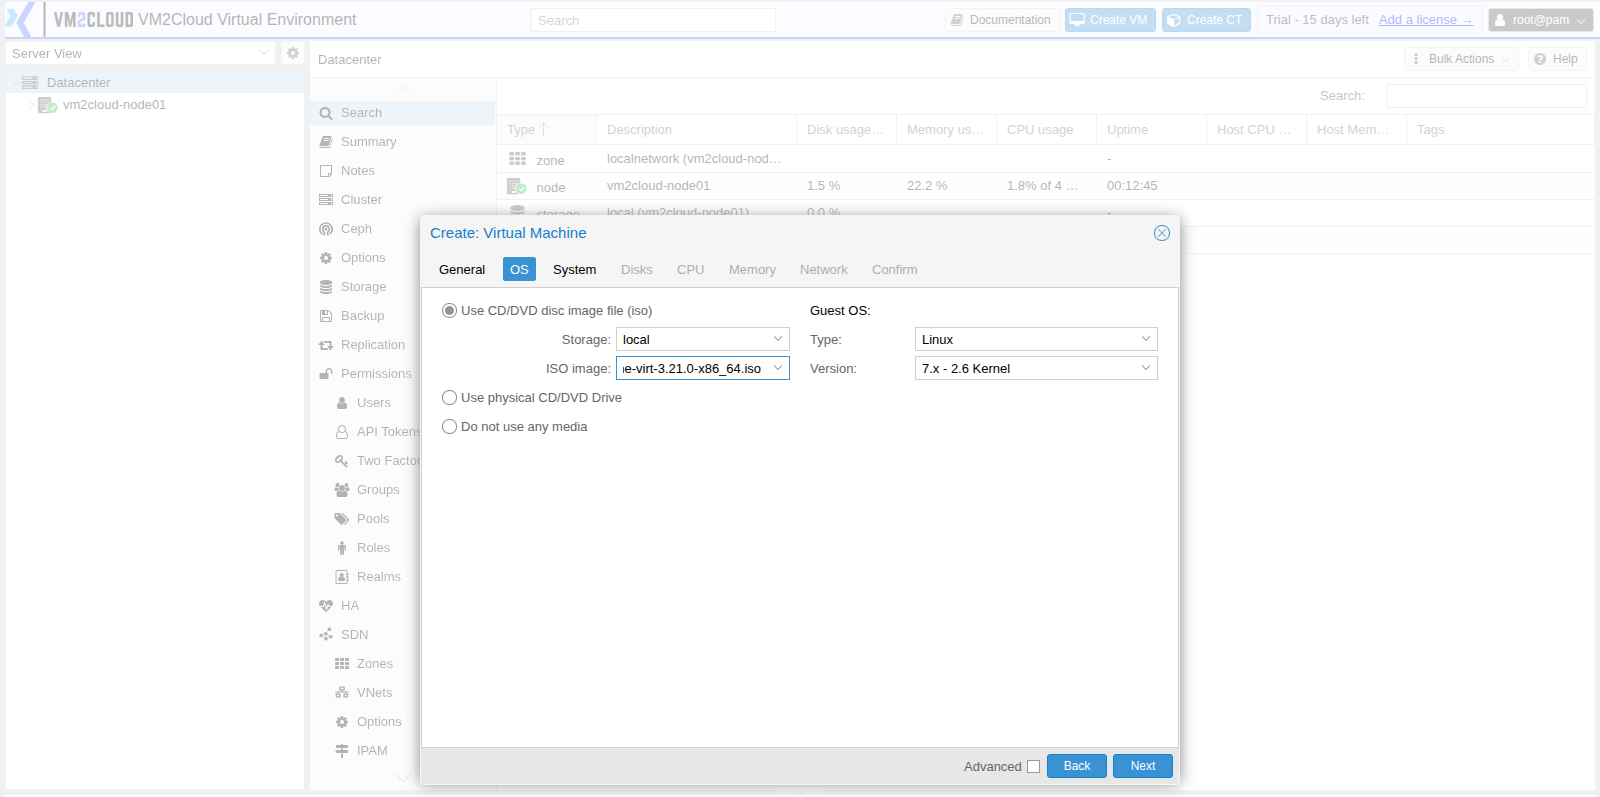
3. OS — choose the installation image
Section titled “3. OS — choose the installation image”- Leave Use CD/DVD disc image file (iso) selected.
- In Storage, select local.
- In ISO image, select the image you want to install.
- Under Guest OS, set Type and Version to match the operating system you are installing.
- Click Next.
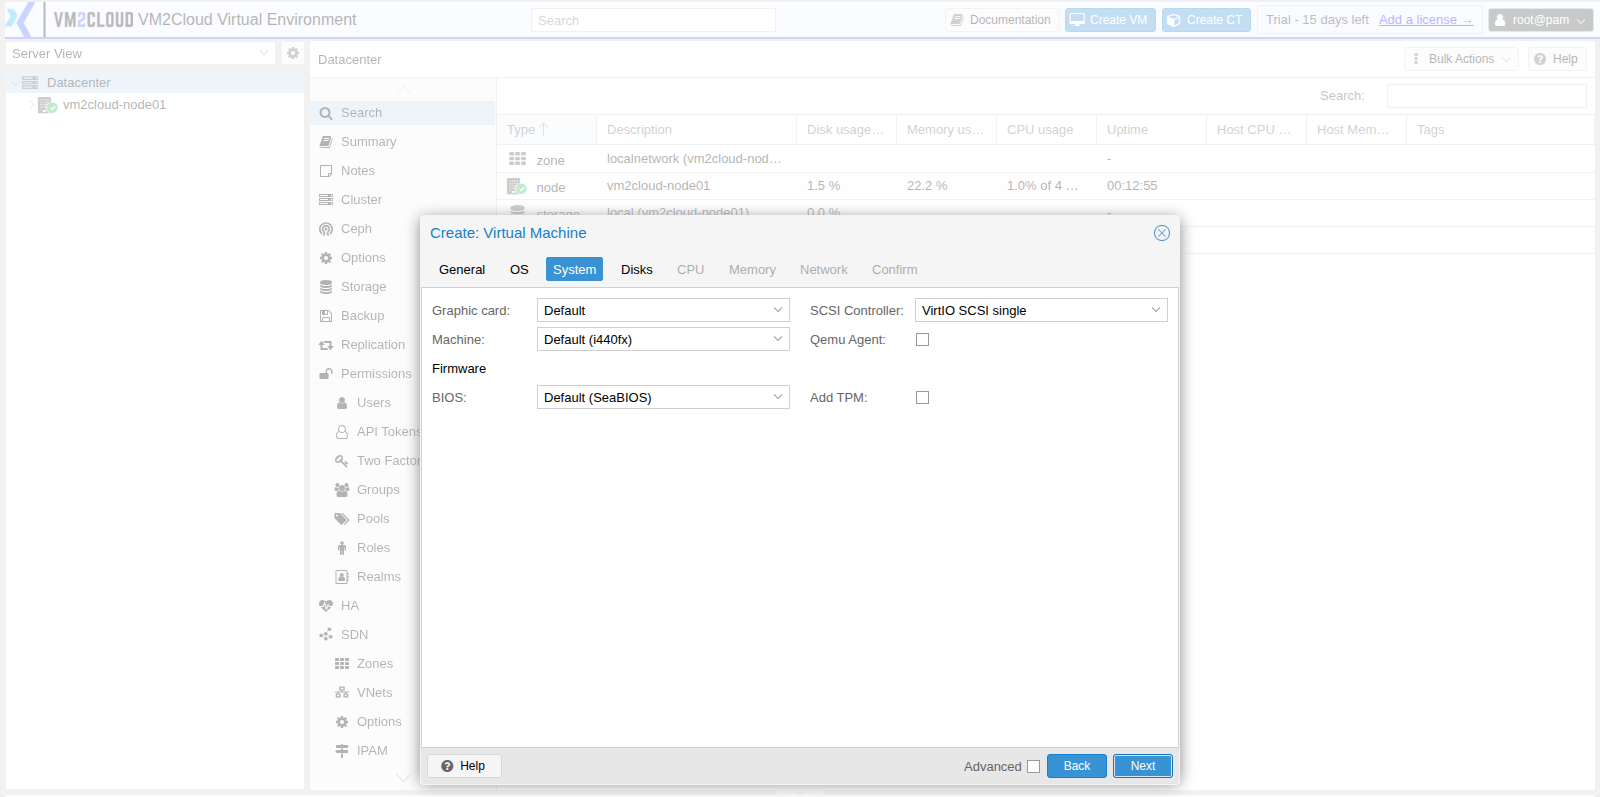
4. System — leave the defaults
Section titled “4. System — leave the defaults”The default settings suit most operating systems.
- Click Next.
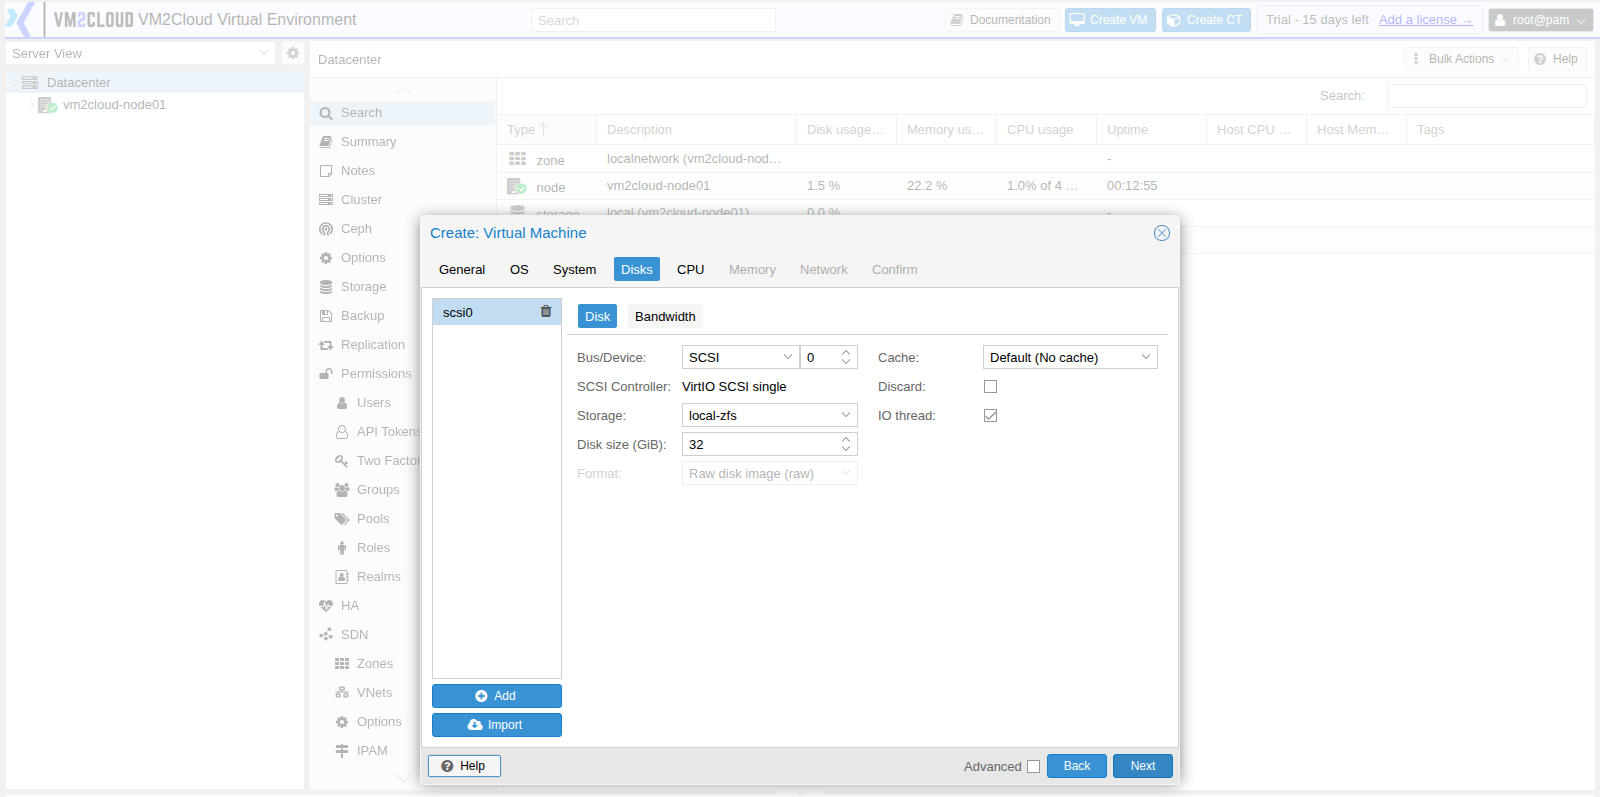
5. Disks — set the disk size
Section titled “5. Disks — set the disk size”- Leave Bus/Device as SCSI.
- In Storage, select local-zfs.
- In Disk size (GiB), type the size you need, for example
32. - Click Next.
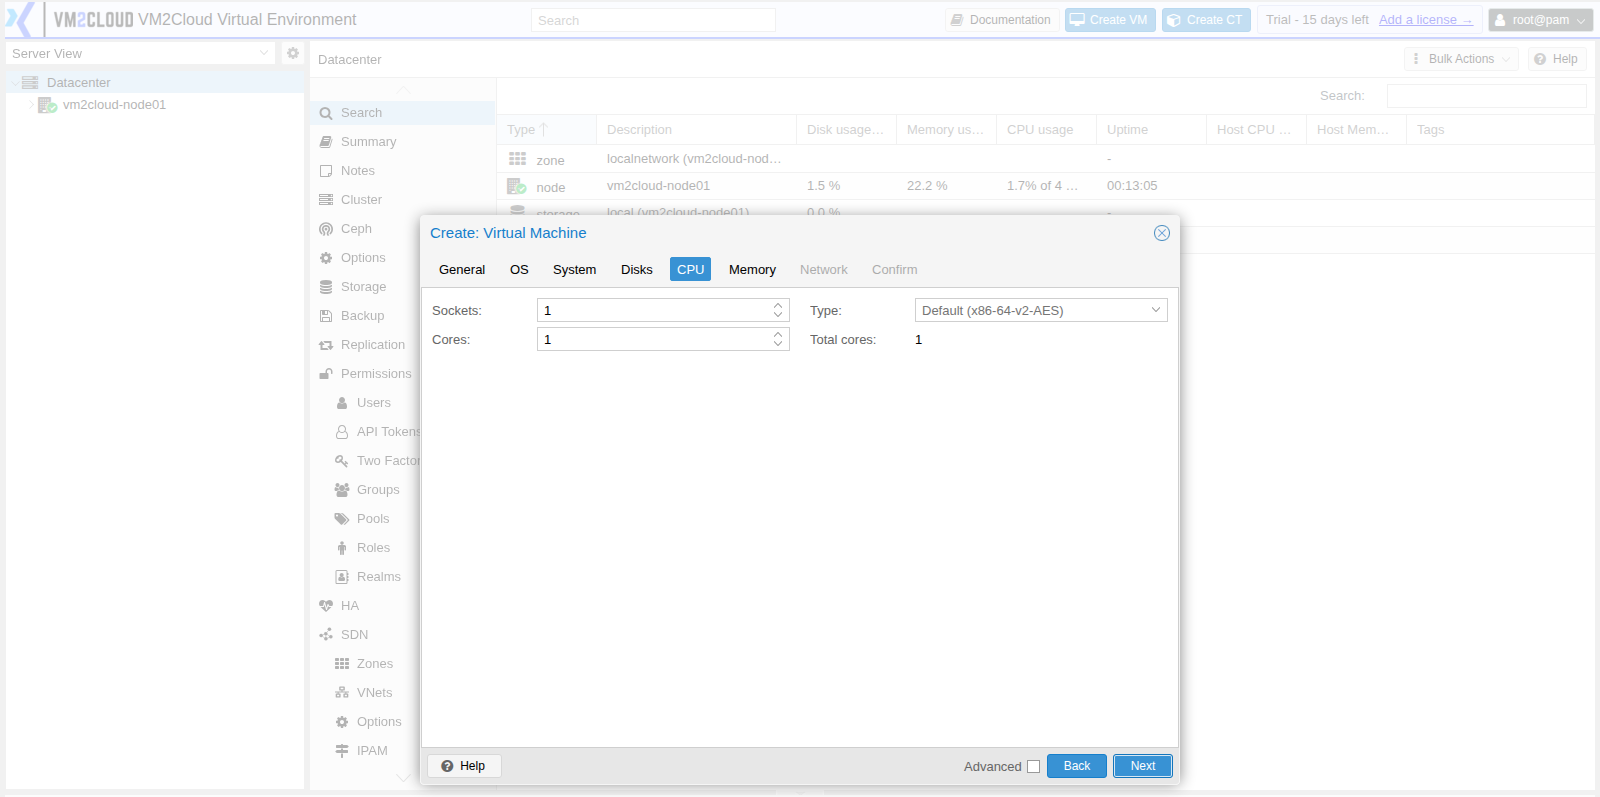
6. CPU — set the processor cores
Section titled “6. CPU — set the processor cores”- In Cores, type the number of processor cores the virtual machine needs.
- Click Next.
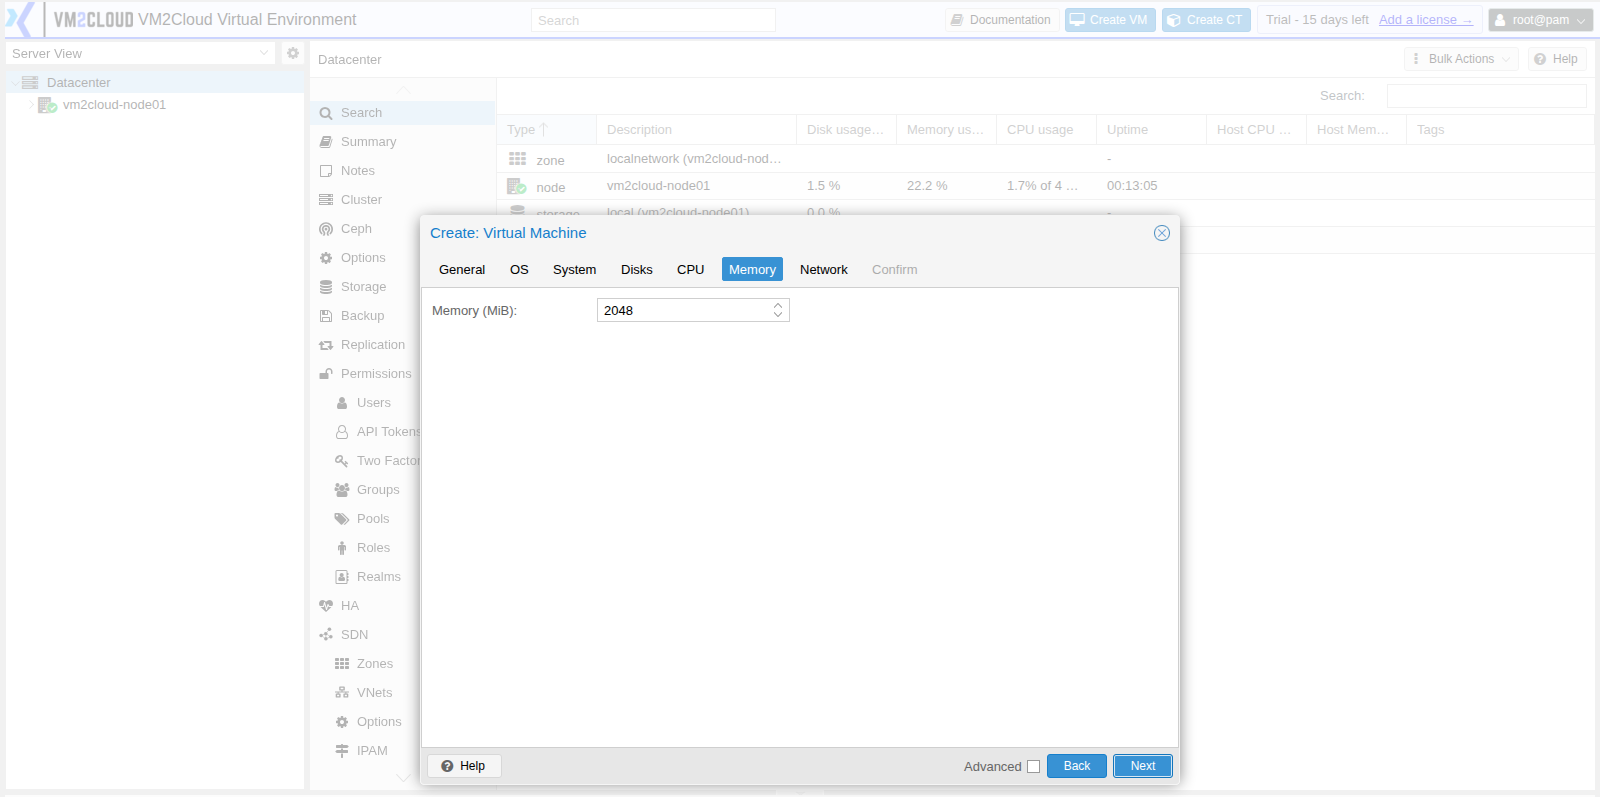
7. Memory — set the memory size
Section titled “7. Memory — set the memory size”- In Memory (MiB), type the memory size in MiB. For example, type
4096for 4 GB. - Click Next.
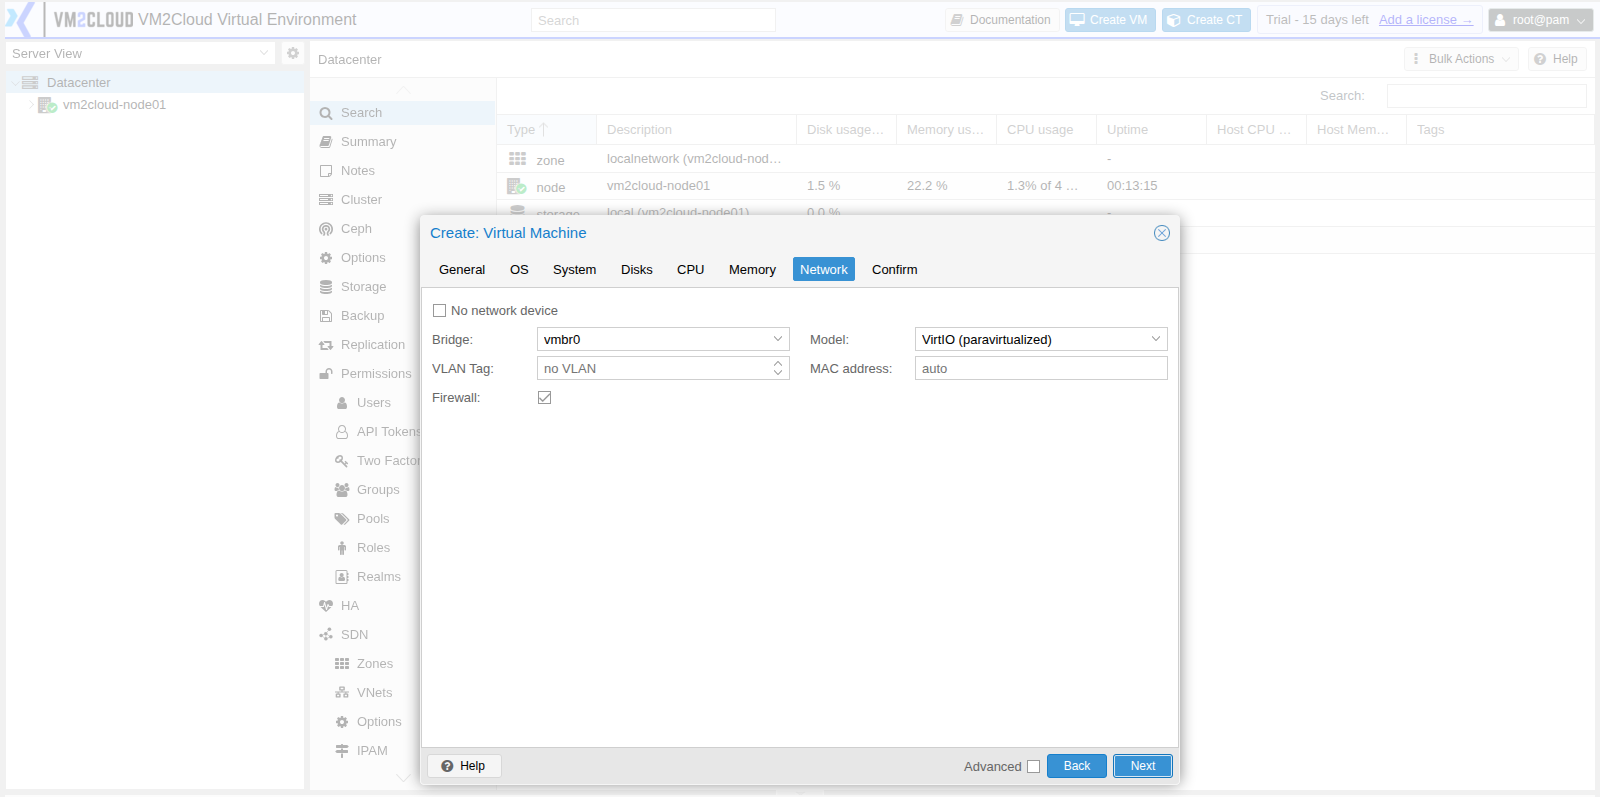
8. Network — leave the defaults
Section titled “8. Network — leave the defaults”- Check that Bridge shows
vmbr0. - Click Next.
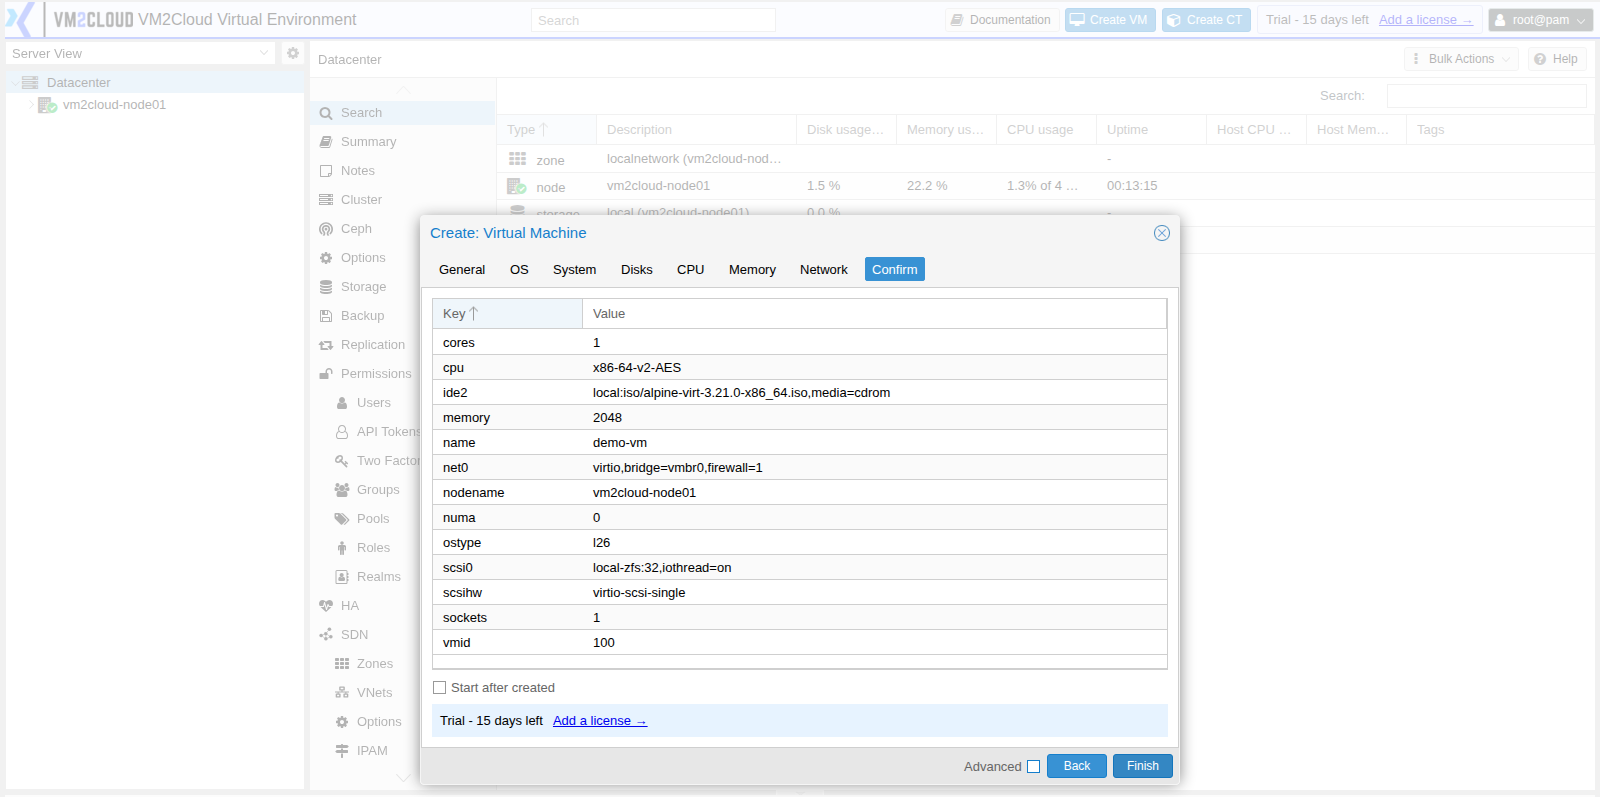
9. Confirm and create
Section titled “9. Confirm and create”- Check the summary. It lists everything you chose.
- Tick Start after created if you want the virtual machine to start straight away.
- Click Finish.
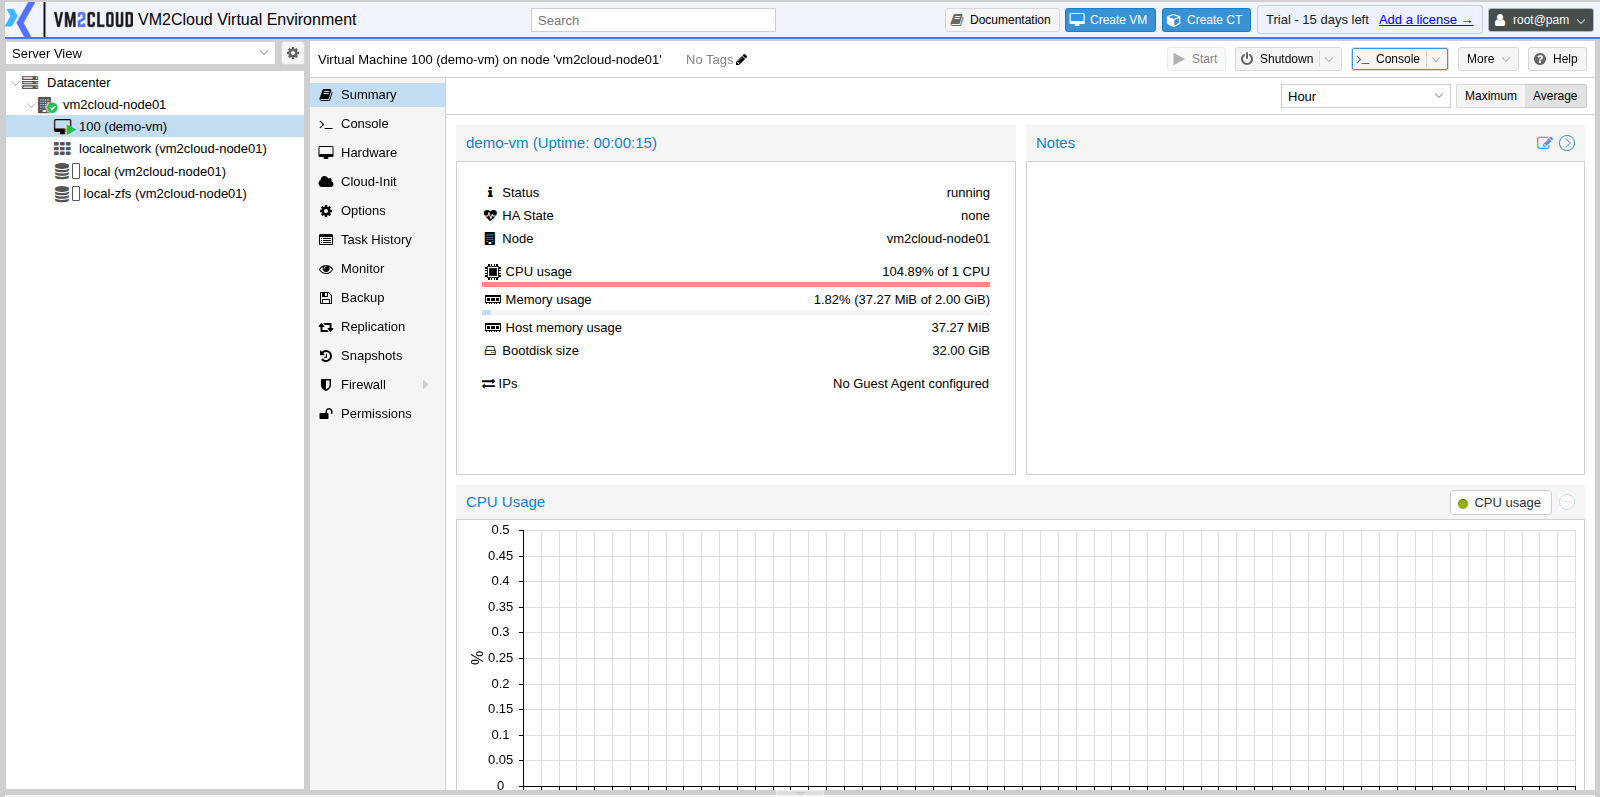
The new virtual machine appears in the Server View panel on the left, under your server.
10. Start the virtual machine and install the operating system
Section titled “10. Start the virtual machine and install the operating system”- Click the new virtual machine in the Server View panel.
- Click Start at the top right.
- Click Console to open the screen of the virtual machine.
- The virtual machine starts from the installation image. Complete the operating system installation in the console window as you would on a physical server.
If something goes wrong
Section titled “If something goes wrong”| What you see | What to do |
|---|---|
| The ISO image list is empty | Set Storage to local on the OS tab. If it is still empty, upload the image first. |
| Next is greyed out on the OS tab | No installation image is selected. Select one from the ISO image list. |
| The virtual machine does not start | Check the Tasks list at the bottom of the screen for the reason. |
| The console stays black | Give the virtual machine a few seconds to start, then click inside the console window. |
| The virtual machine has no network | Check that Bridge is vmbr0, and confirm the VLAN number with your network team. |
Still stuck? Contact VM2Cloud support.