

Installing VM2Cloud VE
This guide installs VM2Cloud Virtual Environment on a new server using the graphical installer. Follow the steps in order. Every screen shown here is the screen you will see on the server.
Before you begin
Section titled “Before you begin”Collect the following before you start. The installer asks for all of it.
| What you need | Example |
|---|---|
| The VM2Cloud installation media | USB stick, or the ISO attached through the server’s remote console |
| A way to see the screen | Monitor and keyboard, or the server’s remote console (iLO / iDRAC / IPMI) |
| Host name for this server | vm2cloud-node01.example.com |
| IP address and subnet size | 192.168.10.51 / 24 |
| Gateway address | 192.168.10.1 |
| DNS server address | 192.168.10.10 |
| Administrator e-mail address | admin@example.com |
| A strong administrator password | At least 8 characters, with letters, numbers and symbols |
If you will use a bonded (redundant) network connection or a management VLAN, also ask your network team for the bonding mode, the two network ports to use, and the VLAN number.
1. Start the server from the installation media
Section titled “1. Start the server from the installation media”- Insert the USB stick, or attach the ISO file using the server’s remote console.
- Power on the server and select the installation media as the boot device.
- Wait for the VM2Cloud boot menu to appear.
- Leave Install VM2Cloud (Graphical) selected and press Enter.

The installer takes a minute or two to start.
2. Accept the licence agreement
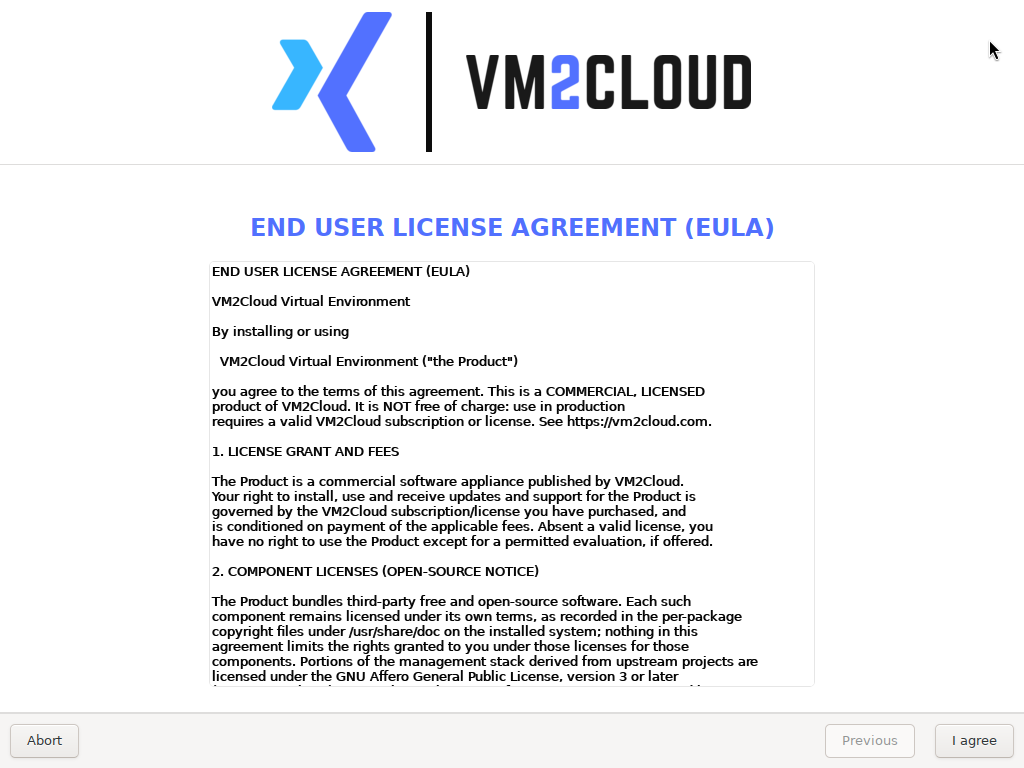
Section titled “2. Accept the licence agreement”- Read the End User Licence Agreement.
- Click I agree.
3. Choose the disks and the storage layout
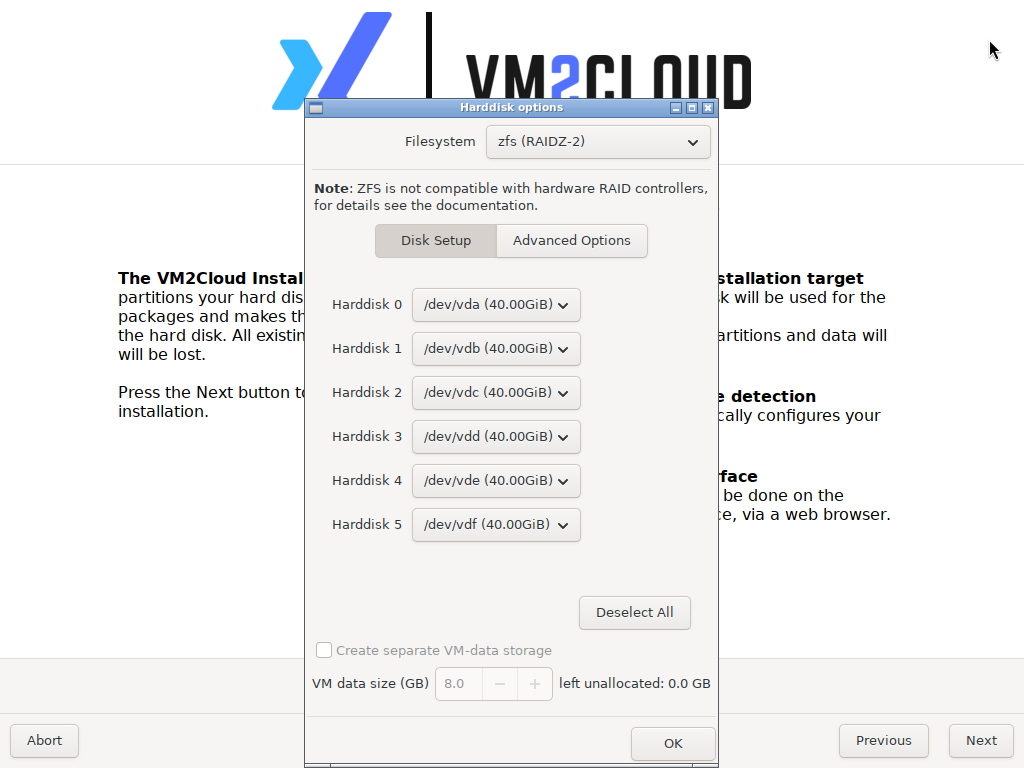
Section titled “3. Choose the disks and the storage layout”The installer shows the disk it will install to.
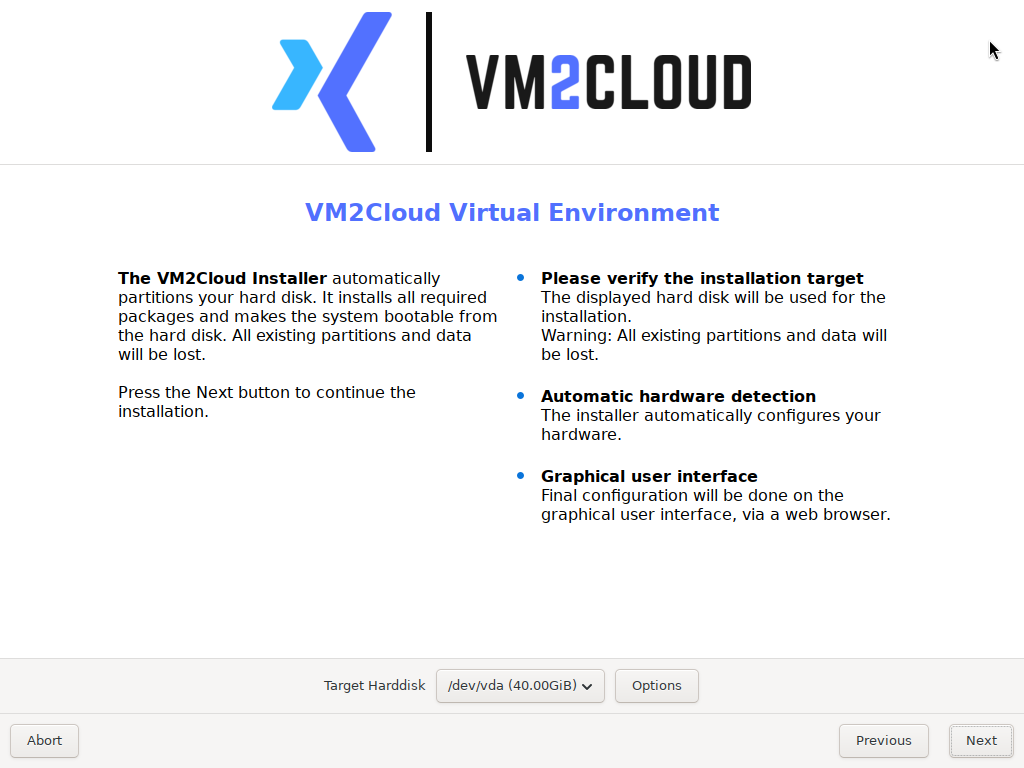
- Click Options.
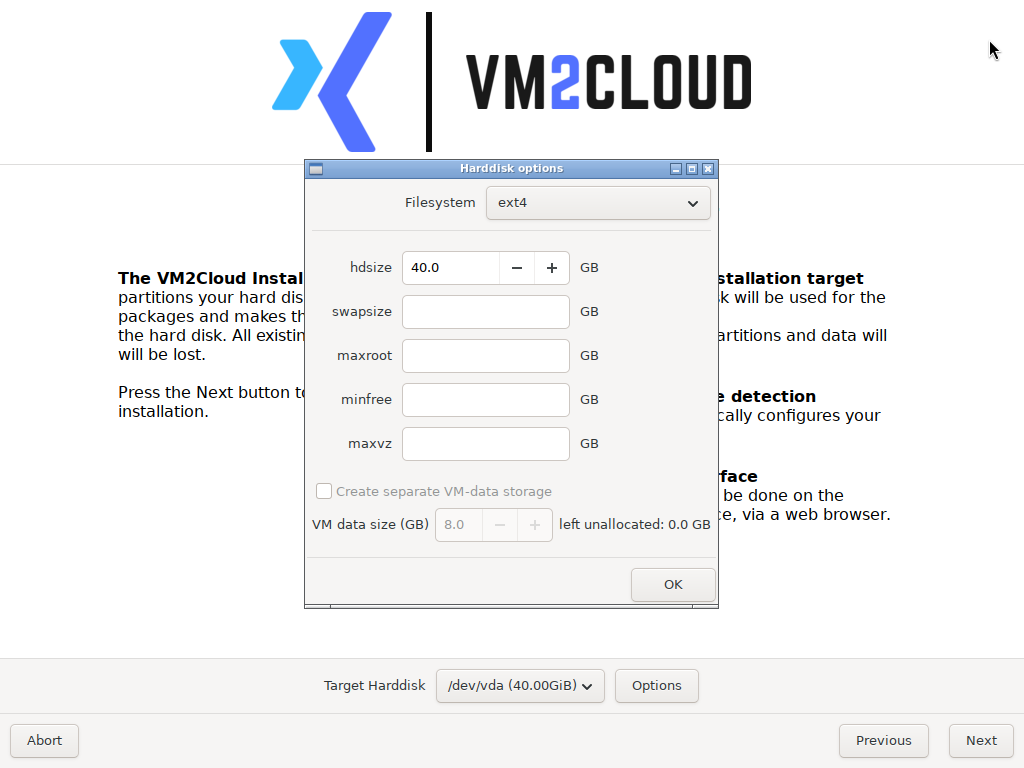
- Open the Filesystem list.
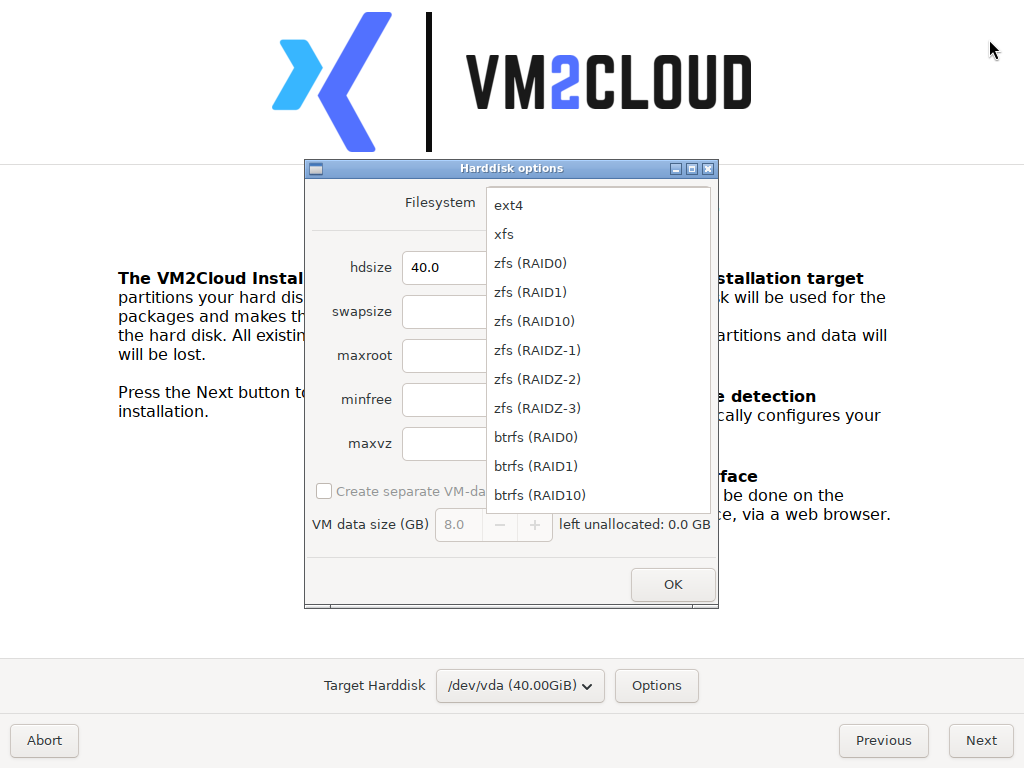
- Select zfs (RAIDZ-2).
- Check that every disk you want to use is listed as Harddisk 0, Harddisk 1, and so on.
Set any disk you do not want to use to
-- do not use --. - Click OK.
- Click Next.
4. Set the location, time zone and keyboard
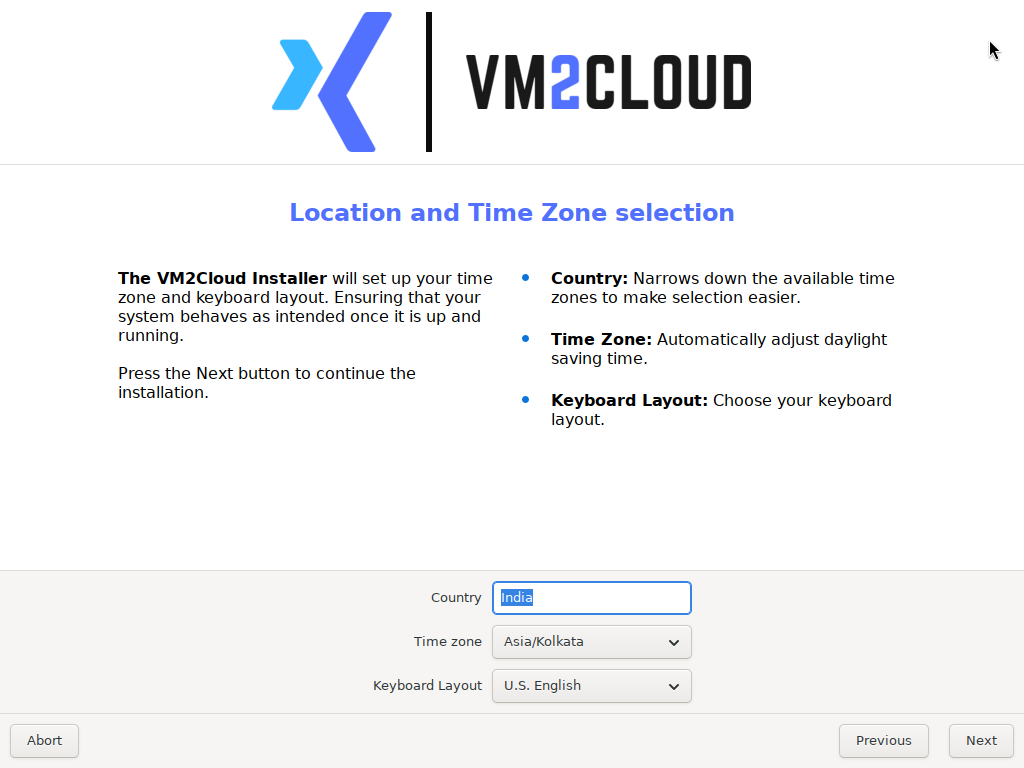
Section titled “4. Set the location, time zone and keyboard”- Check Country, Time zone and Keyboard Layout, and correct them if needed.
- Click Next.
5. Set the administrator password and e-mail address
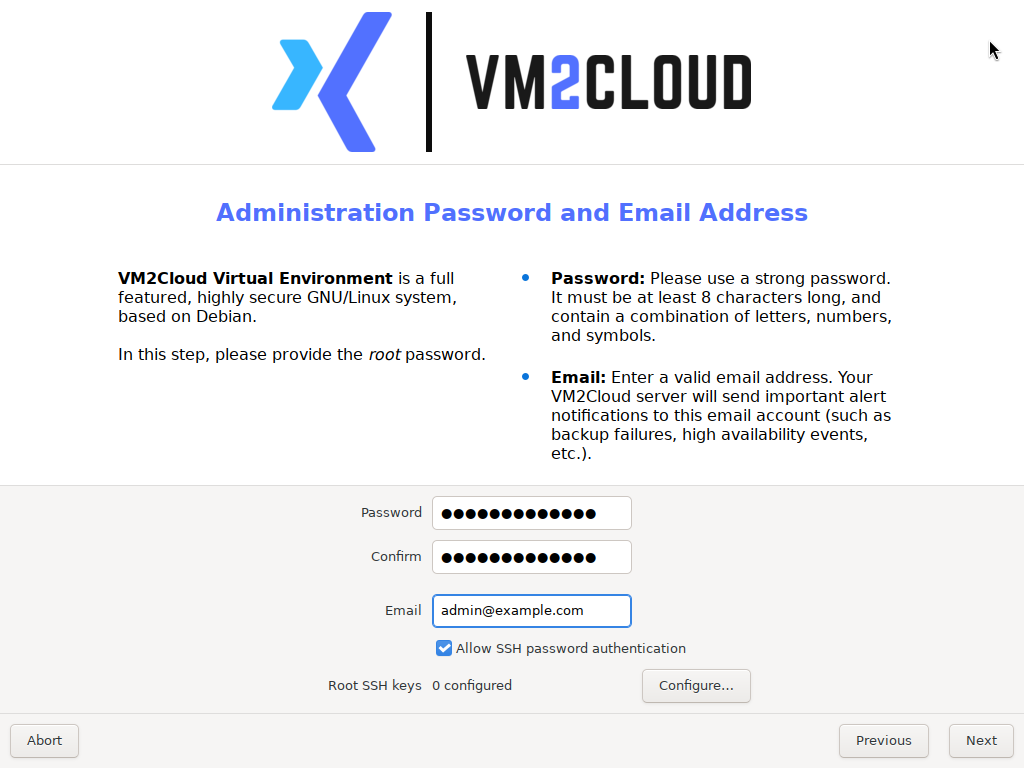
Section titled “5. Set the administrator password and e-mail address”- Type the administrator password in Password.
- Type the same password again in Confirm.
- Replace the address in Email with your administrator e-mail address.
- Click Next.
6. Configure the management network
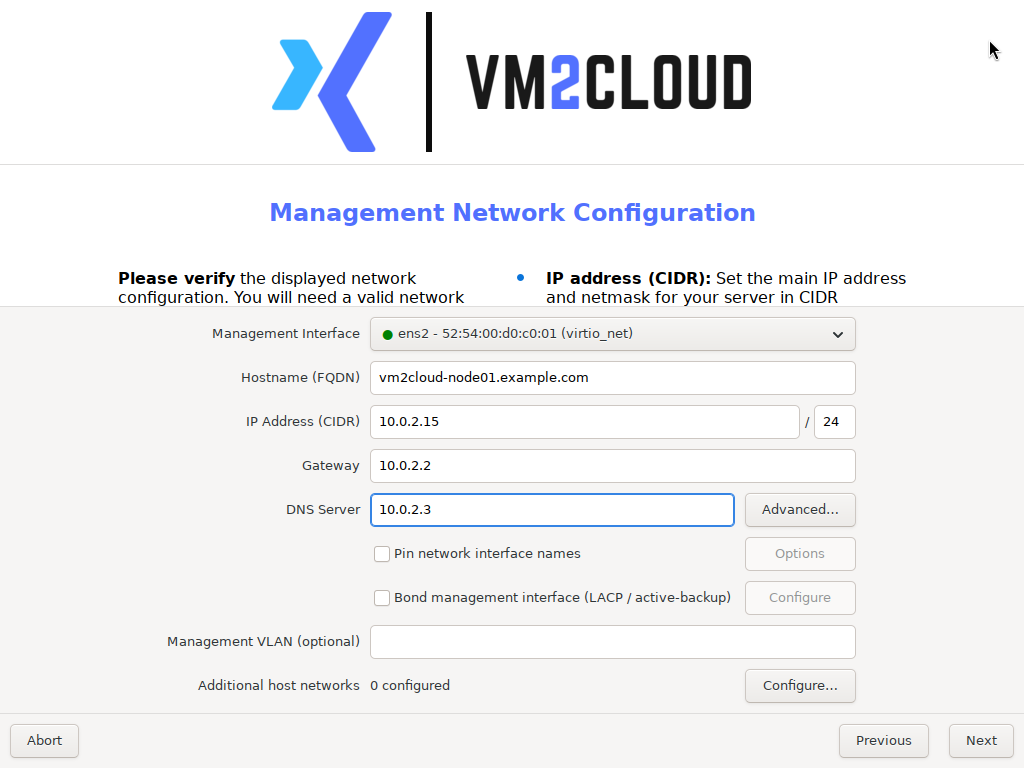
Section titled “6. Configure the management network”This is the address you will use to reach the server afterwards.
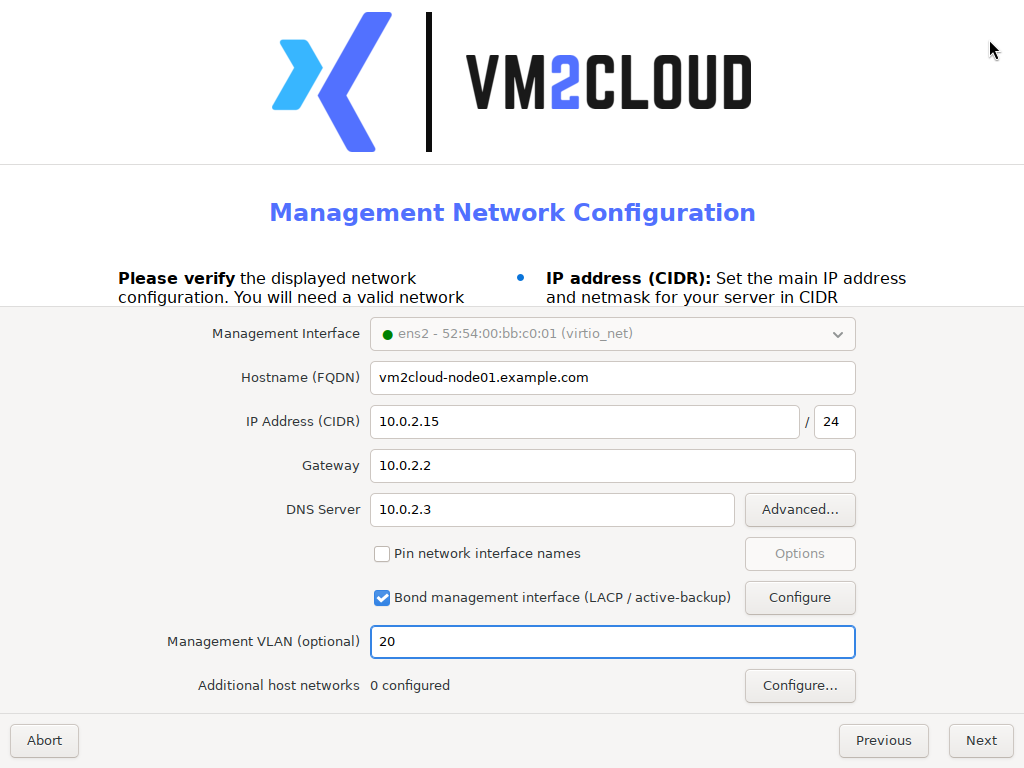
- Check that Management Interface shows the network port that is connected to your network.
- In Hostname (FQDN), type the full host name, for example
vm2cloud-node01.example.com. - In IP Address (CIDR), type the server address and subnet size.
- In Gateway, type the gateway address.
- In DNS Server, type the DNS server address.
- Click Next.
Optional — redundant network connection and management VLAN
Section titled “Optional — redundant network connection and management VLAN”Use this only if your network team has asked for a bonded connection or a management VLAN. Otherwise go straight to section 7.
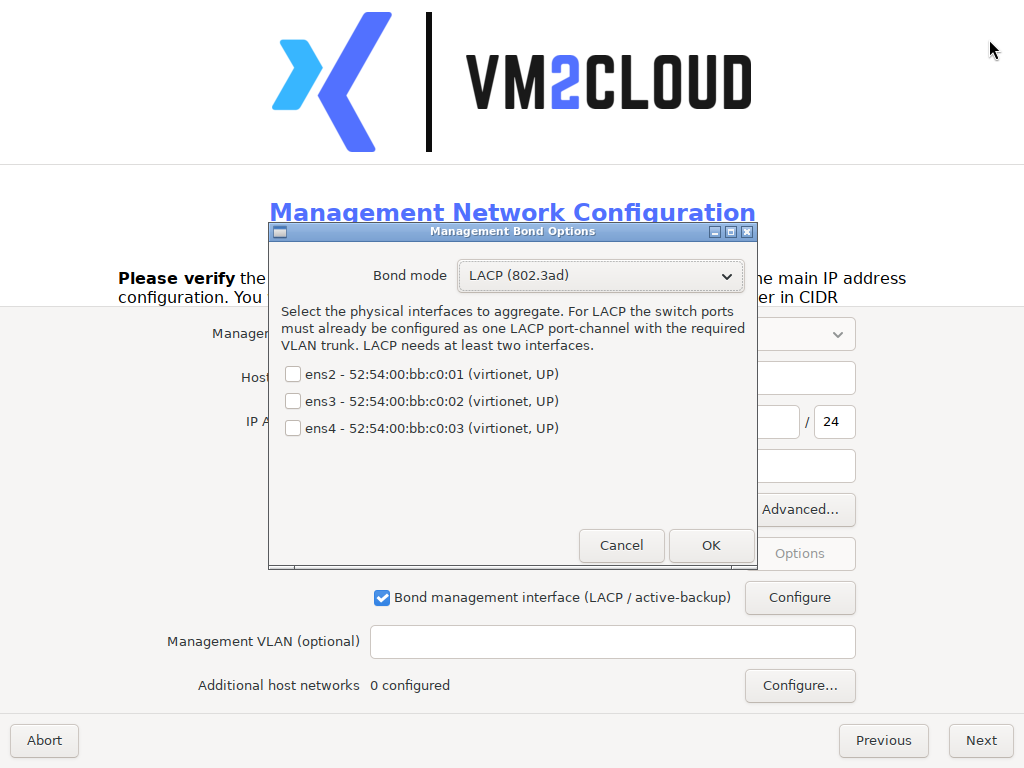
- Tick Bond management interface (LACP / active-backup). The Management Bond Options window opens.
- In Bond mode, choose the mode your network team specified.
- Tick the two network ports that form the bond.
- Click OK.
- If a management VLAN is required, type the VLAN number in Management VLAN (optional).
- Click Next.
7. Review the summary and start the installation
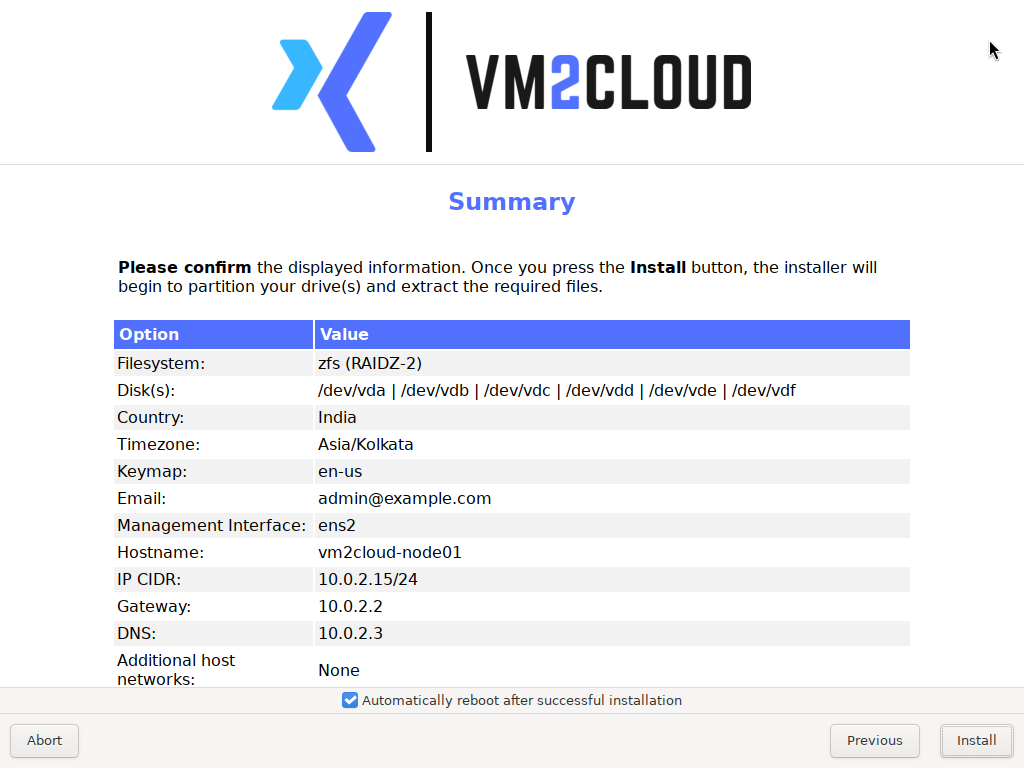
Section titled “7. Review the summary and start the installation”- Check every line on the Summary screen, especially the disks, the host name and the IP address.
- Leave Automatically reboot after successful installation ticked.
- Click Install.
The installation runs on its own and takes several minutes.
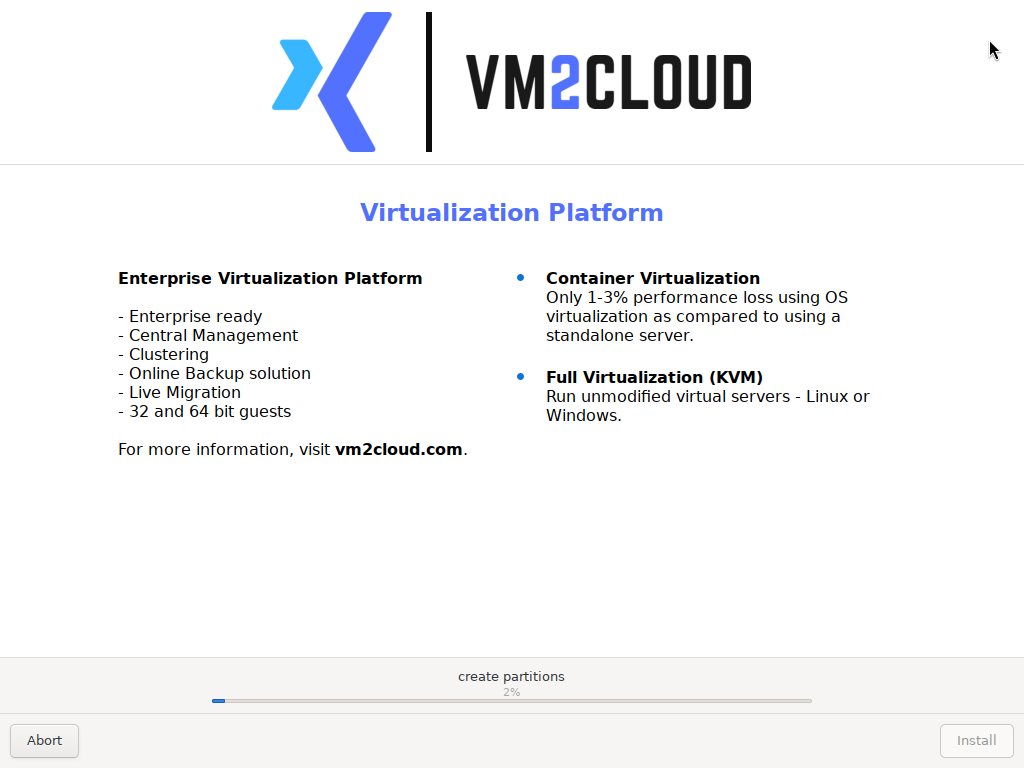
When it finishes, the server restarts automatically. Remove the USB stick, or detach the ISO in the remote console, so the server starts from its own disks.
8. Sign in to the web interface
Section titled “8. Sign in to the web interface”- On a computer that can reach the server, open a web browser.
- Go to
https://<the IP address you entered>:8006— for examplehttps://192.168.10.51:8006 - Your browser warns that the connection is not private. This is expected on a new server. Continue to the site.
- Sign in:
- User name:
root - Password: the administrator password from step 5
- Realm: leave as Linux PAM standard authentication
- User name:
- Click Login.
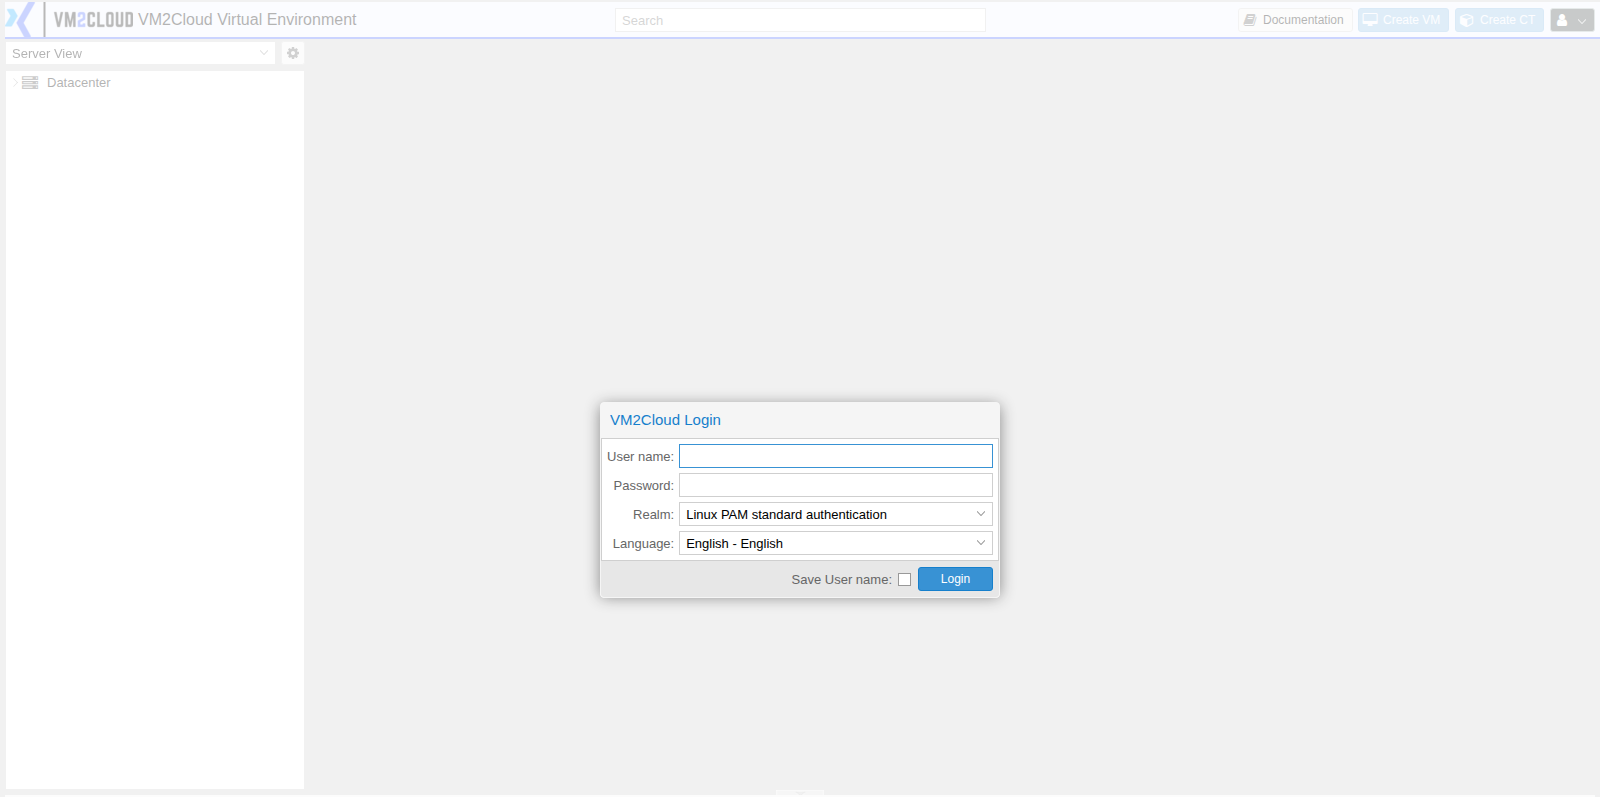
The server is now installed and ready to use. It runs on a 15-day trial from this point.
What to do next
Section titled “What to do next”- Upload an ISO image so you have installation media for virtual machines.
- Create your first virtual machine.
If something goes wrong
Section titled “If something goes wrong”| What you see | What to do |
|---|---|
| The server starts its own operating system instead of the installer | Re-enter the boot menu and select the USB stick or virtual media as the boot device. |
| The graphical installer does not appear | Restart and choose Install VM2Cloud (Terminal UI) from the boot menu. |
| No Hard Disk found! | Check that the disks are connected and that the disk controller is enabled in the server’s firmware settings. |
| The web interface does not open after installation | Check the IP address, subnet, gateway and cabling. Sign in at the server console and confirm the address is correct. |
| You cannot sign in | Confirm you are using user name root and the realm Linux PAM standard authentication. |
Still stuck? Contact VM2Cloud support.