

Storage management
Every disk, ISO image and backup archive lives on a storage. Storages are defined once for the whole cluster under Datacenter → Storage, and each is told which nodes can reach it and what kinds of content it may hold.
There are two separate steps, in two different places, and confusing them is the most common storage problem:
| Step | Where | What it does |
|---|---|---|
| 1. Prepare the hardware | node → Disks | Turns physical disks into a pool, volume group or filesystem — see Disks and local storage |
| 2. Publish it | Datacenter → Storage | Makes that space usable by machines, with content types and node visibility |
A disk prepared in step 1 but never published in step 2 will not appear anywhere machines can use it.
What a new installation already has
Section titled “What a new installation already has”| Storage | Type | Holds | Shared |
|---|---|---|---|
local |
Directory | Backups, ISO images, container templates, imports | No |
local-lvm or local-zfs |
LVM-Thin or ZFS | Machine disks and containers | No |
Which of the two you get depends on the filesystem chosen at installation. Neither is shared, so on a single node this is all you need, and in a cluster you will want to add something the other nodes can reach as well.
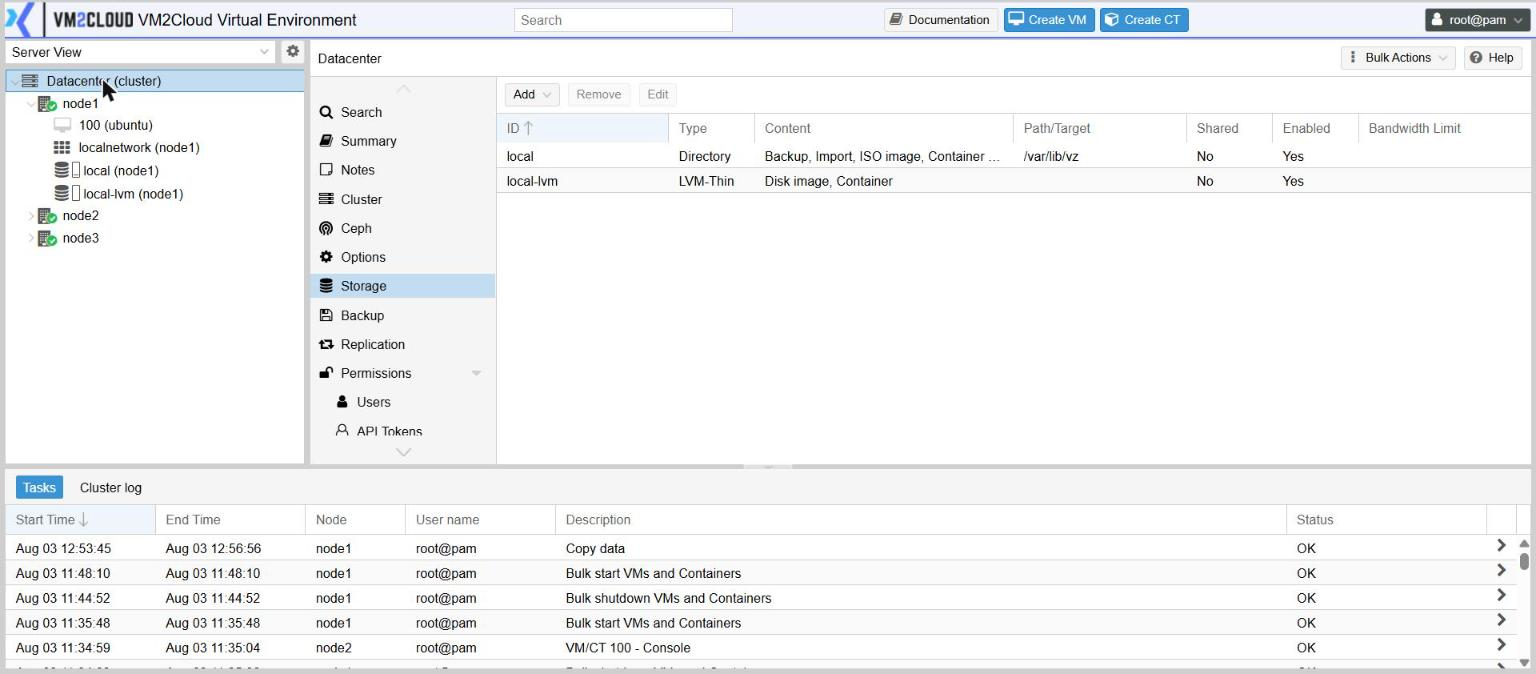
Adding a storage
Section titled “Adding a storage”- Open Datacenter → Storage.
- Click Add and choose the type.
- Give it an ID — a short name. It cannot be changed later.
- Fill in the type-specific fields (below).
- Set Content to what it may hold.
- Set Nodes to the nodes that can reach it. Leave empty for all nodes.
- Leave Enable ticked and click Add.
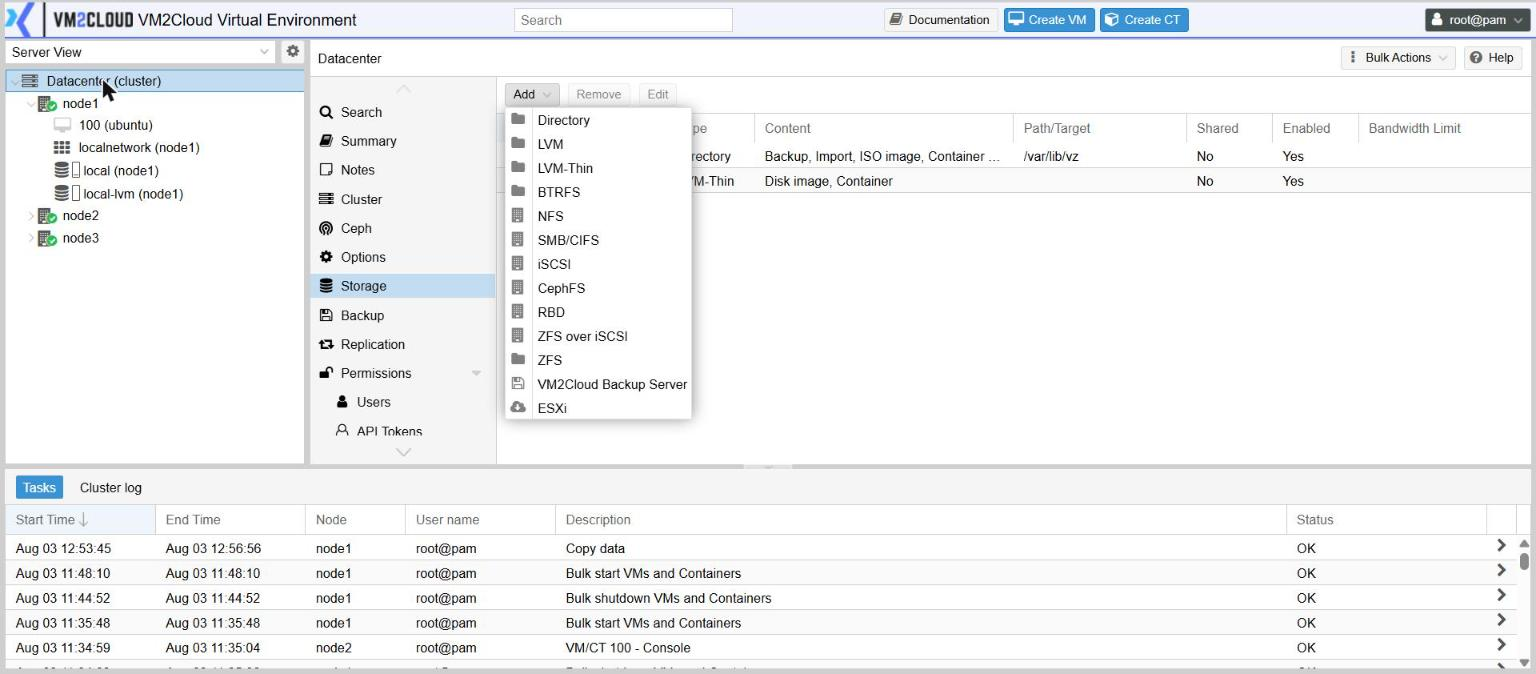
Content types
Section titled “Content types”| Content | Holds |
|---|---|
| Disk image | Virtual machine disks |
| ISO image | Operating-system installation media |
| Container template | Container base images |
| Backup | Backup archives |
| Container | Container root filesystems |
| Snippets | Small configuration files used at guest start-up |
| Import | Guest images staged for importing |
Only tick what a storage is genuinely for. A storage offering every content type shows up in every picker, which makes it easy to put a backup on the same disk as the machine it protects.
Choosing a type
Section titled “Choosing a type”On the node’s own disks
Section titled “On the node’s own disks”| Type | Use it when |
|---|---|
| Directory | A plain filesystem path. Simple, holds any content type. Good for ISO images and backups. |
| LVM-Thin | The default for machine disks. Space is allocated as it is used. |
| LVM | Machine disks with space allocated up front. Also the way to use shared block storage — see iSCSI below. |
| ZFS | Machine disks with snapshots, checksums and compression. Required if you want replication. |
| BTRFS | An alternative filesystem for machine disks. |
On other equipment
Section titled “On other equipment”| Type | Use it when |
|---|---|
| NFS | A file server exports a share. Simple and widely available. |
| SMB/CIFS | A Windows or NAS file share. |
| iSCSI | A SAN presents block devices. Usually used as the base for an LVM storage layered on top — that combination is the standard way to give every node the same shared block storage. |
| CephFS / RBD | A Ceph cluster — either one this system runs itself, or an external one. |
| ZFS over iSCSI | A ZFS appliance reachable over iSCSI. |
| VM2Cloud Backup Server | A dedicated backup server. Deduplicated, verifiable, and can be encrypted. |
| ESXi | Read machines off an existing ESXi host in order to import them. |
Fields by type
Section titled “Fields by type”Everything shares ID, Content, Nodes and Enable. Beyond that:
| Type | Also asks for |
|---|---|
| Directory | Directory (the path), Shared |
| LVM | Base storage, Volume group, Shared |
| LVM-Thin | Volume group, Thin Pool |
| BTRFS | Path |
| ZFS | ZFS Pool, Thin provision, Block Size |
| NFS | Server, Export, NFS Version |
| SMB/CIFS | Server, Share, Username, Password, Domain, Subdirectory |
| iSCSI | Portal, Target, Use LUNs directly |
| CephFS | Monitor(s), Username, FS Name, Secret Key |
| RBD | Pool, Monitor(s), Username, Keyring, Namespace |
| VM2Cloud Backup Server | Server, Username, Password, Datastore, Namespace, Fingerprint |
| ESXi | Server, Username, Password, Skip Certificate Verification |
Some fields only appear once you tick Advanced in the dialog.
Retention
Section titled “Retention”Every storage has a Backup Retention tab setting how many backups to keep on it: Keep Last, Keep Hourly, Keep Daily, Keep Weekly, Keep Monthly, Keep Yearly, and Maximum Protected.
This is the default for the storage. A backup job has its own retention settings which override it for the backups that job writes.
Maximum Protected caps how many archives may be marked protected. Protected archives are never pruned, so without a cap a handful of them can fill a storage.
Browsing a storage
Section titled “Browsing a storage”Select a storage in the tree to see what is on it:
| Panel | What you can do |
|---|---|
| Summary | Whether it is enabled and active, what it holds, and how full it is |
| Backups | Restore, view the configuration a backup captured, add notes, protect an archive, prune, delete |
| ISO Images | Upload installation media, or fetch it with Download from URL |
| CT Templates | Upload, download, browse the supplied template list, or pull an image from a registry |
| Import | Stage guest images from elsewhere and import them |
| Permissions | Who may use this storage |
Removing a storage
Section titled “Removing a storage”Remove takes the storage out of the cluster’s configuration. It does not delete the data — but machines whose disks were on it will no longer start. Move or delete the machines first.
If something goes wrong
Section titled “If something goes wrong”| What you see | What to do |
|---|---|
| A storage is not offered when creating a machine | Its Content does not include Disk image, or Nodes excludes the node you are creating on. |
| An ISO you uploaded is not in the list | You uploaded it to a storage that is not visible from the node the machine is on. |
| A storage shows as inactive | The node cannot reach it. Check the server address, credentials and network path. |
| “no space left” although the pool looks empty | A thin pool can exhaust its metadata before its data space. Check both figures on node → Disks → LVM-Thin. |
| A machine will not start after a node failure | Its disk is on storage only the failed node could see. This is what shared storage or replication prevents. |
Still stuck? Contact VM2Cloud support.