

Uploading an ISO image
Before you can install an operating system inside a virtual machine, its installation image
(the .iso file) must be uploaded to the server. This guide uploads an ISO image and confirms
that it appears in the ISO image list when you create a virtual machine.
Before you begin
Section titled “Before you begin”- The
.isofile must be on the computer you are working from. - You need an administrator sign-in for the VM2Cloud web interface.
1. Sign in to the web interface
Section titled “1. Sign in to the web interface”- Open a web browser and go to
https://<server IP address>:8006 - Sign in as
rootwith the administrator password.
2. Open the local storage
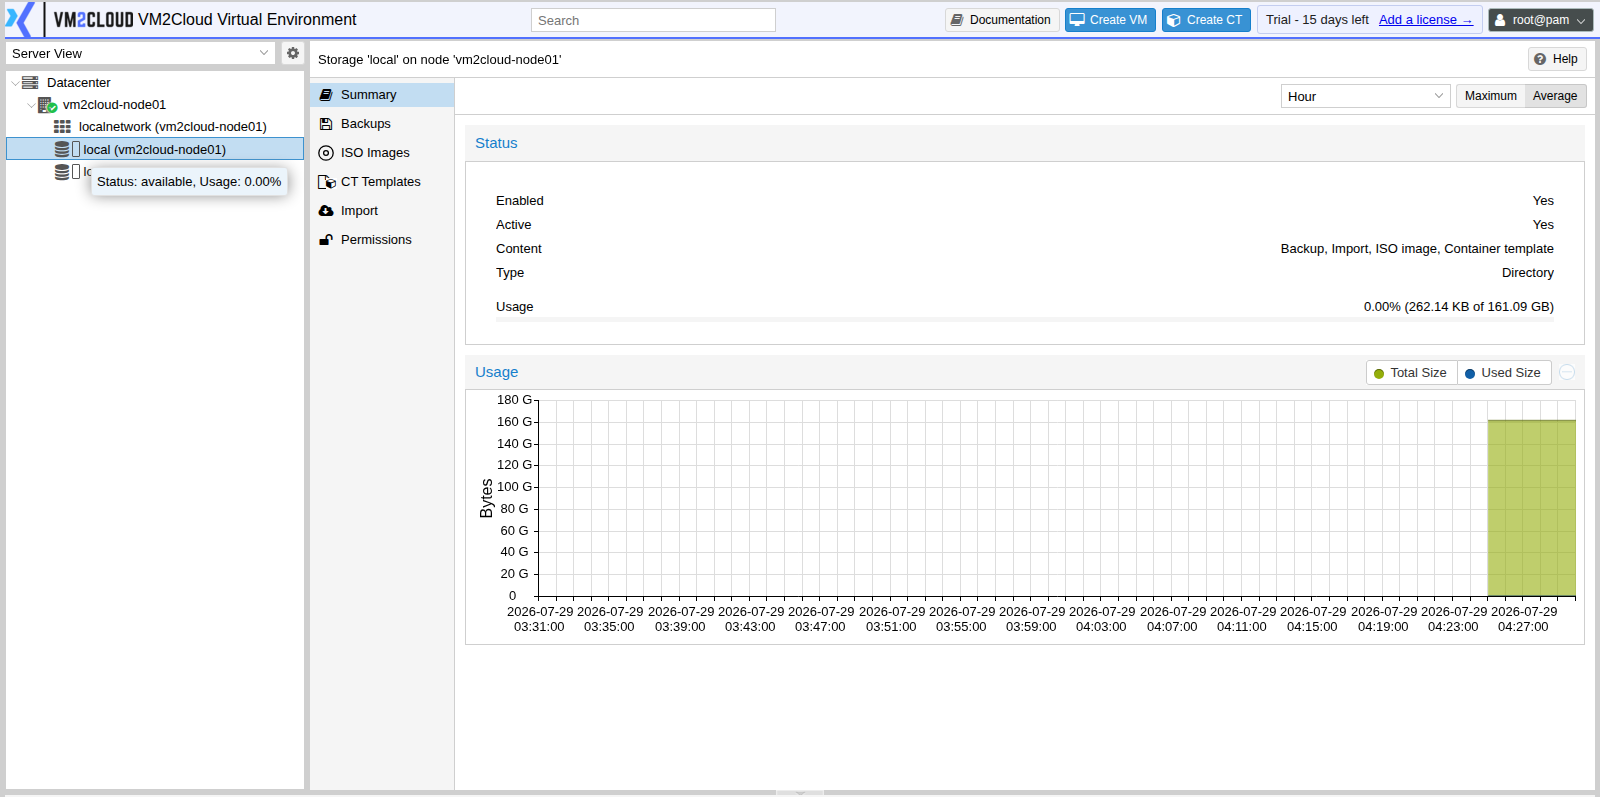
Section titled “2. Open the local storage”- In the Server View panel on the left, click the arrow next to your server name to expand it.
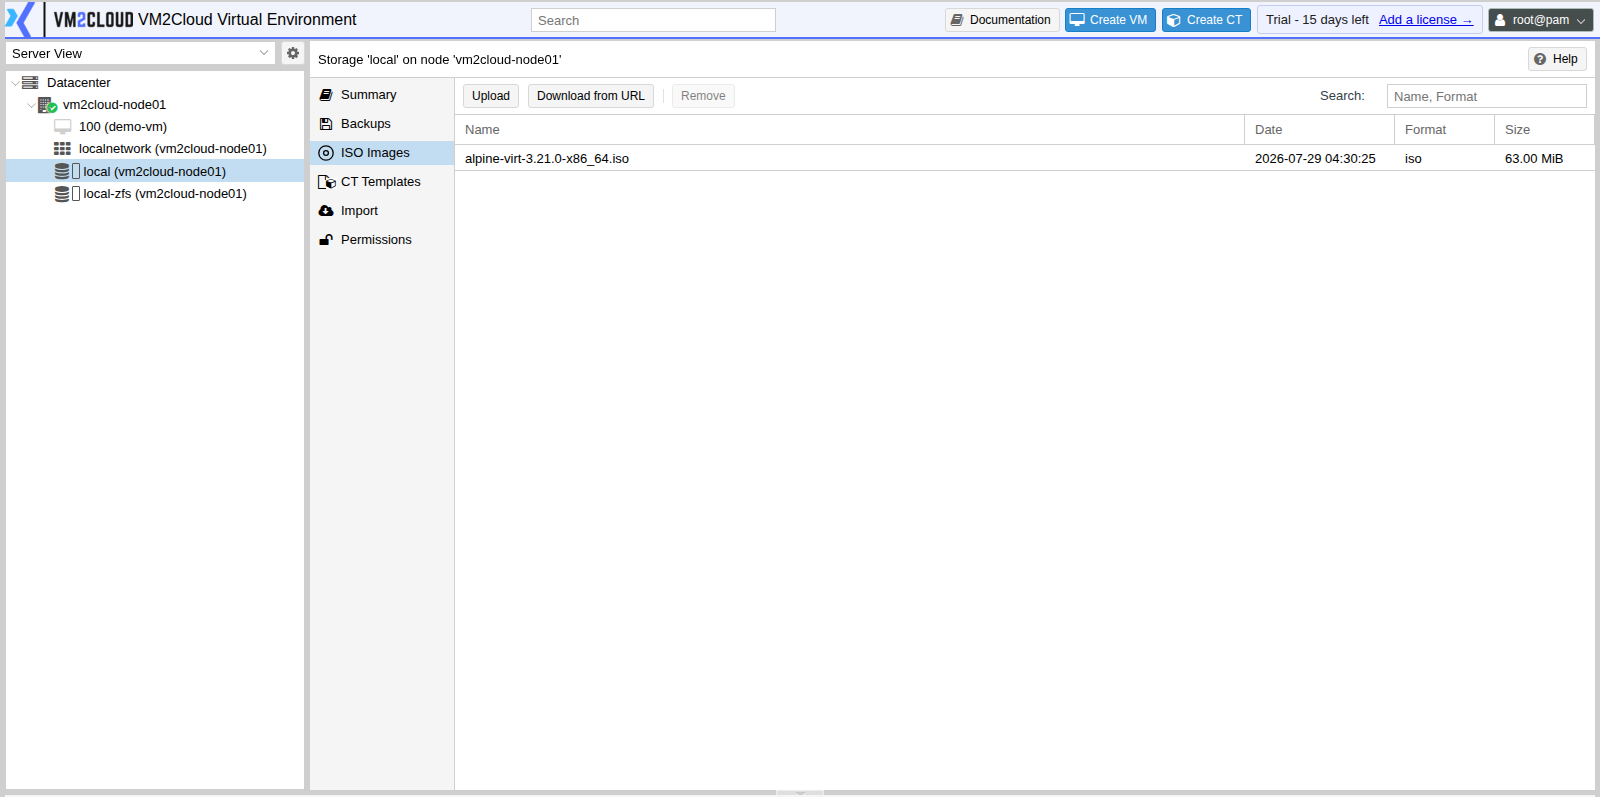
- Click local (your server name).
3. Open the ISO Images view
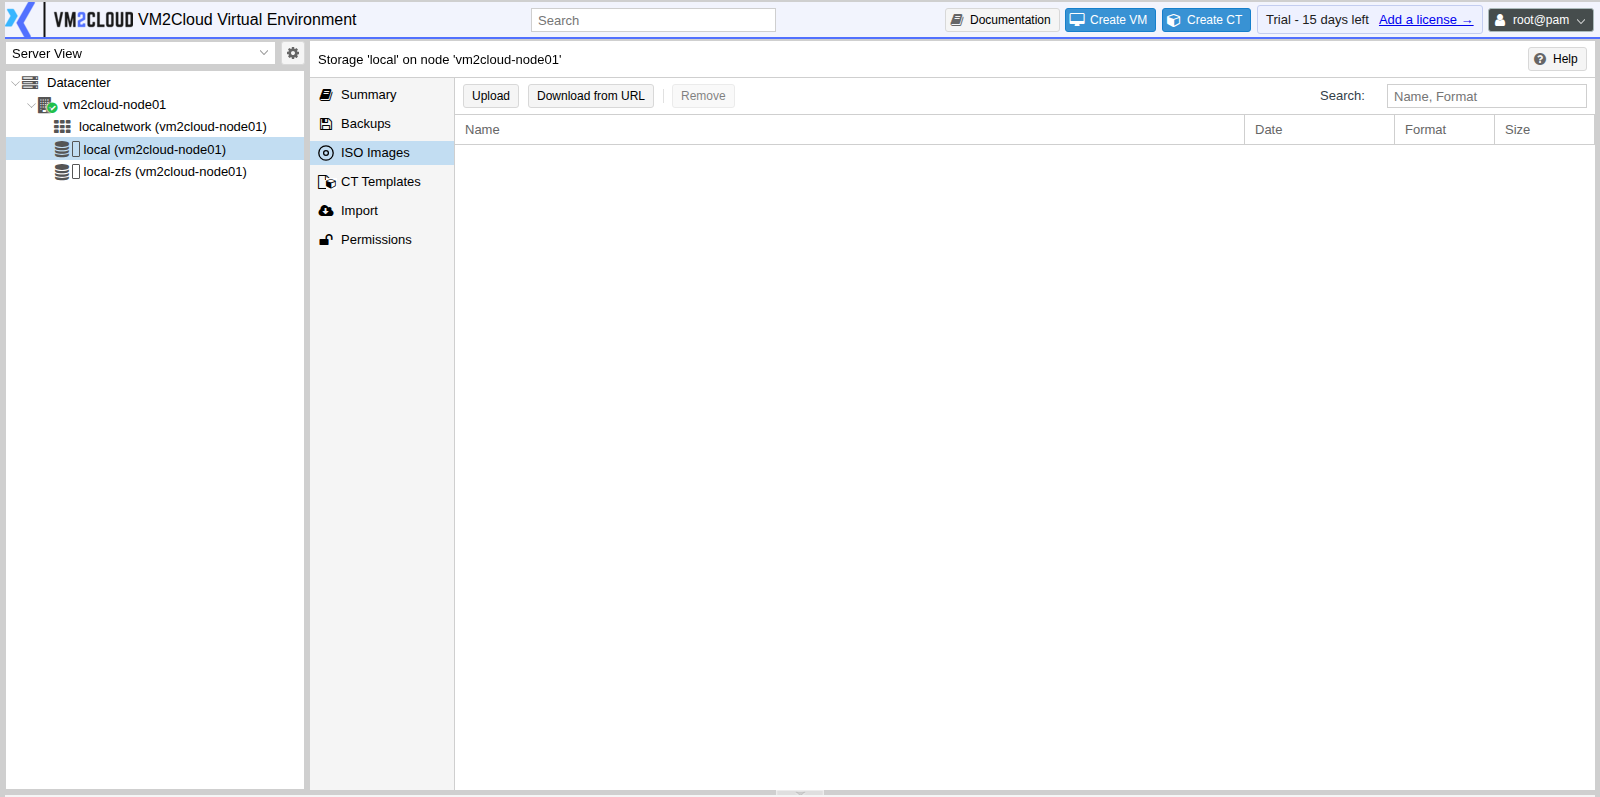
Section titled “3. Open the ISO Images view”Click ISO Images in the menu next to the tree.
4. Upload the ISO file
Section titled “4. Upload the ISO file”- Click Upload.
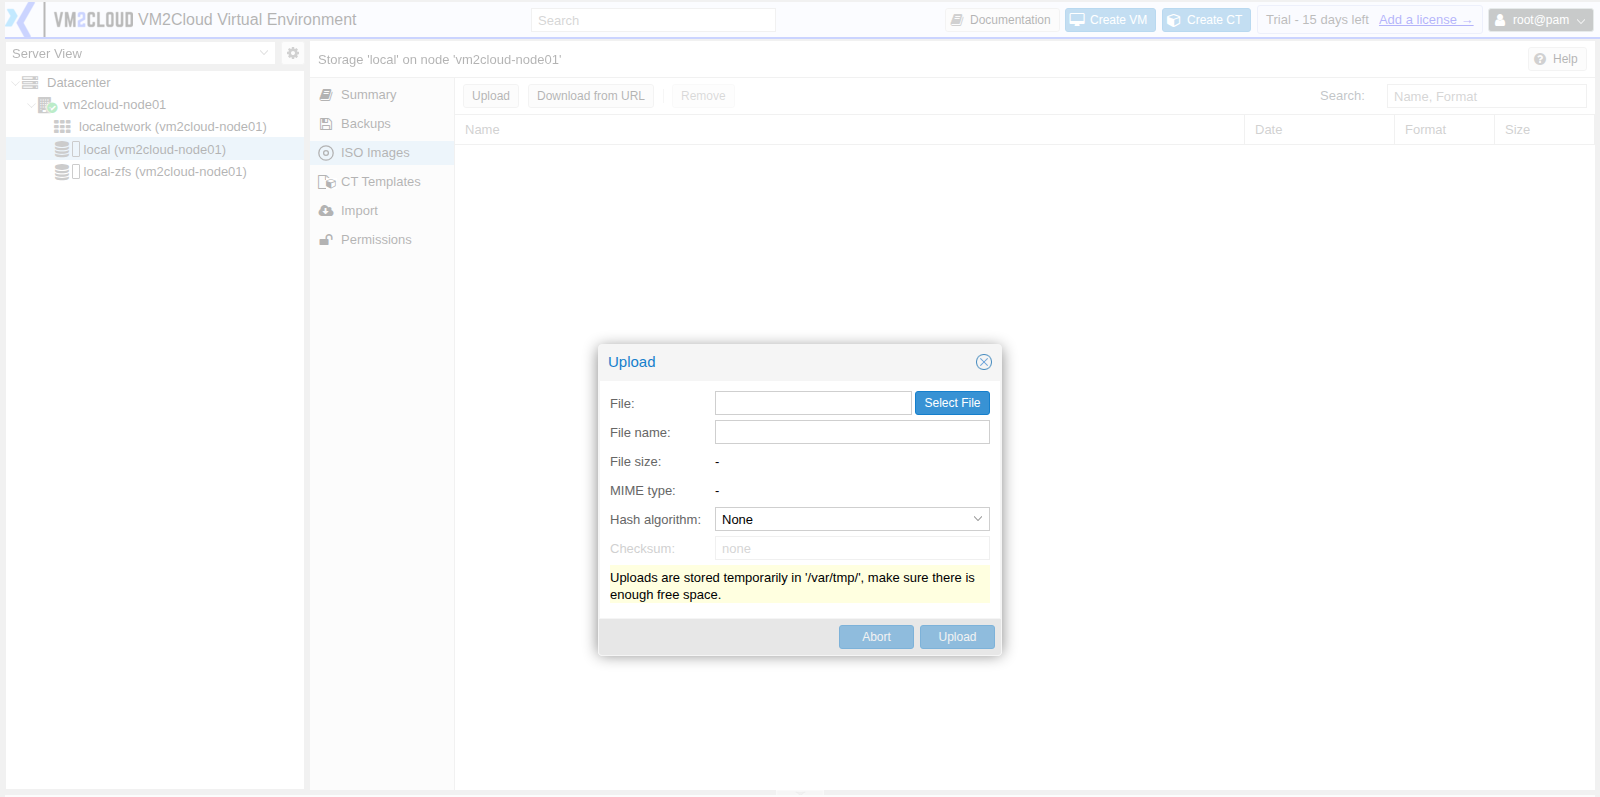
- Click Select File, then choose the
.isofile on your computer. - Check the File name shown. Leave Hash algorithm set to None.
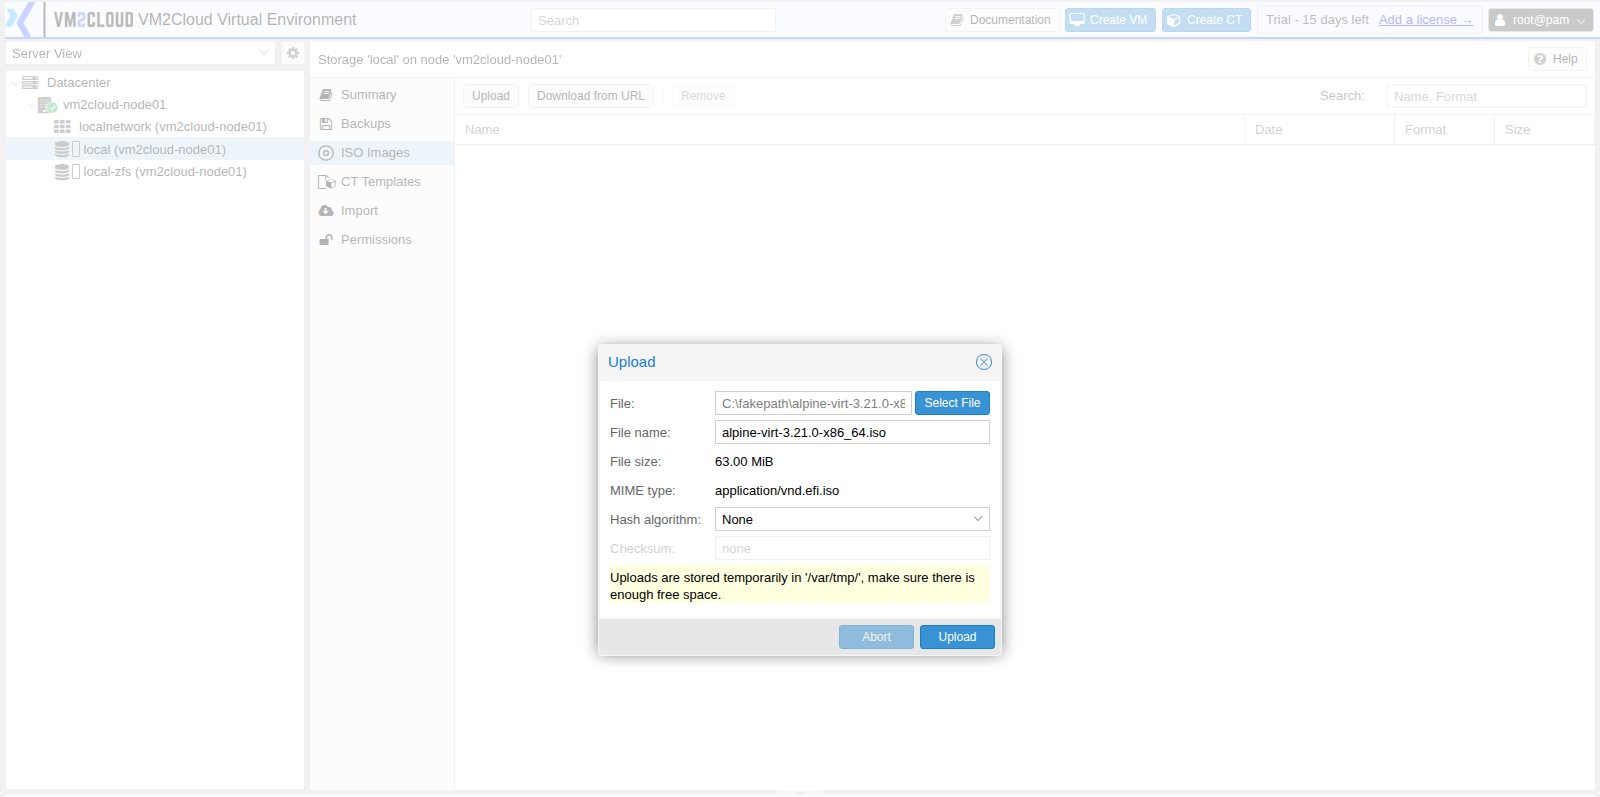
- Click Upload.
A task window opens and shows the progress. Wait until it reports TASK OK, then close it.
5. Confirm the image is available
Section titled “5. Confirm the image is available”The file now appears in the ISO Images list with its date, format and size.
6. Check that it appears when creating a virtual machine
Section titled “6. Check that it appears when creating a virtual machine”- Click Create VM at the top right.
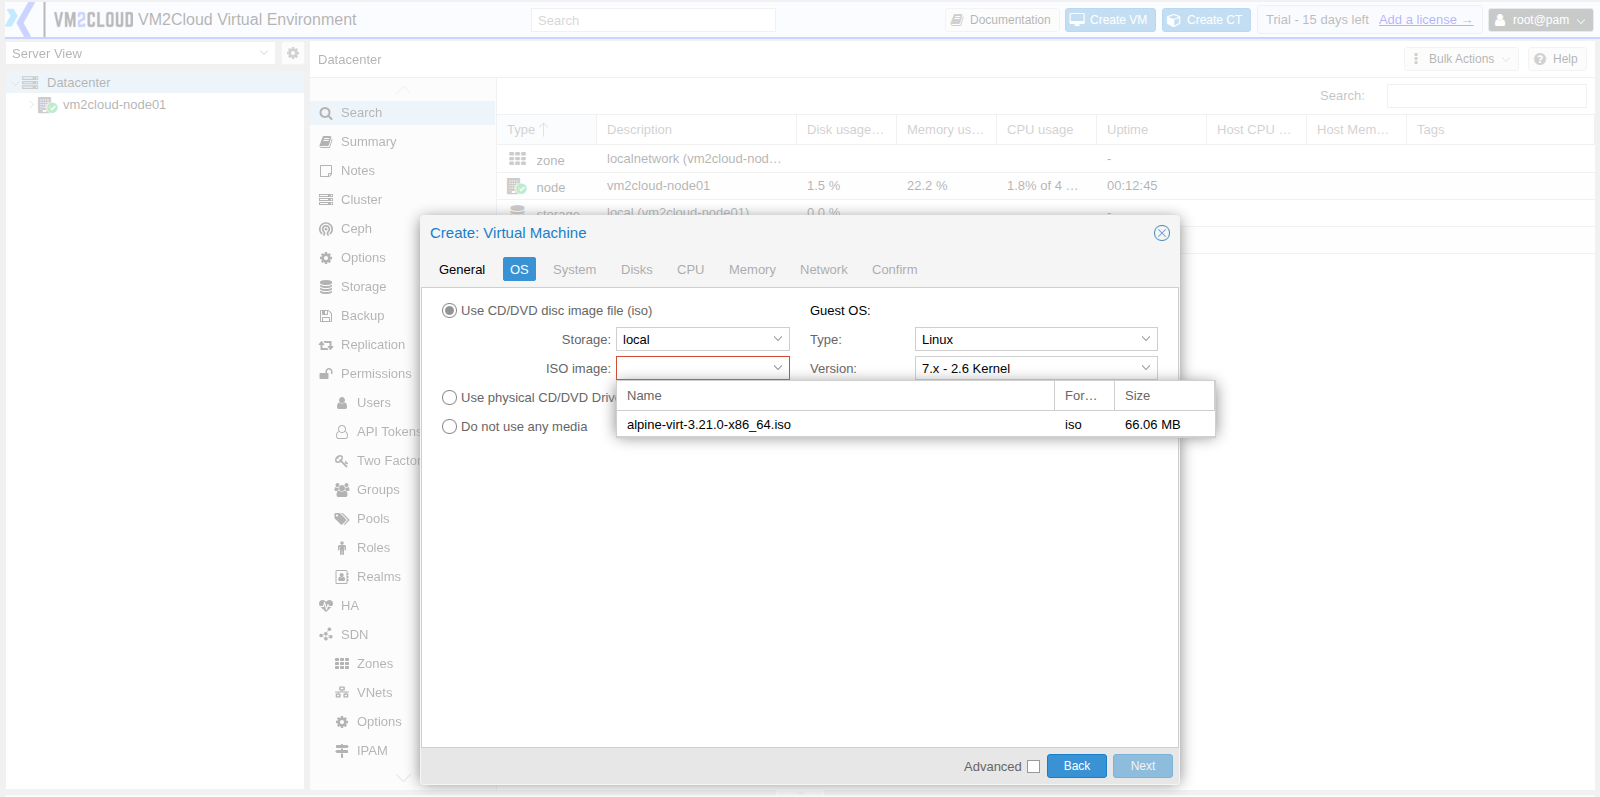
- Go to the OS tab.
- Leave Use CD/DVD disc image file (iso) selected.
- In Storage, select local.
- Open the ISO image list — your uploaded image is listed and can be selected.
You can now either continue and create the virtual machine, or click the close button to exit the wizard. To create a virtual machine, follow Creating a virtual machine.
Alternative — download an image directly to the server
Section titled “Alternative — download an image directly to the server”If the image is available on a web address and the server has internet access, you can let the server fetch it instead of uploading from your computer:
- Open local → ISO Images.
- Click Download from URL.
- Paste the address of the
.isofile and click Query URL. - Check the file name and click Download.
If something goes wrong
Section titled “If something goes wrong”| What you see | What to do |
|---|---|
| There is no ISO Images option | You selected local-zfs. Select local instead. |
| The uploaded image is not in the ISO image list | Check that Storage on the OS tab is set to local. |
| The upload fails or stops | Check that the server has enough free space, and that the file really is an .iso file. |
| The upload is very slow | This depends on your network connection to the server. Consider using Download from URL instead. |
Still stuck? Contact VM2Cloud support.